Essential Floral Tools & Supplies for Beginners: Start Your Flower Arranging Journey Like a Pro
Let me start with a little secret: I’ve been where you are right now. A few years ago, I wandered into a local flower shop, mesmerized by the way the florist turned a bunch of loose stems into a breathtaking arrangement—something that looked effortless, but I quickly learned was anything but. I left that day with a armful of roses, a cheap pair of kitchen scissors, and a dream to create that same magic at home. Spoiler alert: Those kitchen scissors? They crushed the rose stems, the flowers wilted within 24 hours, and I felt like a total failure. Sound familiar?
If you’re a beginner eager to dive into the world of flower arranging—whether you want to spruce up your home, create heartfelt gifts for loved ones, or even turn this hobby into a side hustle—you need to start with the right floral tools and florist supplies. The truth is, great flower arranging isn’t just about picking pretty flowers; it’s about having the tools that make the process easy, fun, and frustration-free. And let’s be real: When you have the right gear, you’ll feel confident, your arrangements will look polished, and you’ll actually want to keep practicing (instead of giving up after one bad attempt).
I’ve spent years testing every floral tool and supply under the sun—from budget-friendly picks to professional-grade gear—and I’m here to share exactly what you need as a beginner. No fluff, no fancy jargon, just honest, actionable advice from someone who’s been in your shoes. We’ll break down the essential flower arranging tools, must-have florist supplies, and even a few pro tips to help you get started. By the end of this article, you’ll have a clear checklist of everything you need to build your own floral toolkit and start creating stunning arrangements that will make your friends and family say, “You did that yourself?!”
Why the Right Floral Tools Matter (Trust Me, I Learned the Hard Way)
Before we dive into the list, let’s talk about why investing in basic floral tools and supplies is so important—especially for beginners. When I first started, I thought, “How different can a pair of scissors be?” Turns out, very different. Kitchen scissors are designed to cut food, not flower stems. They crush the vascular system of the stem, which blocks water flow and causes flowers to wilt fast. A good pair of floral scissors, on the other hand, makes a clean, sharp cut that keeps your flowers hydrated and vibrant for days.
The same goes for every other tool on this list. The right florist supplies don’t just make the job easier—they make your arrangements look professional. You wouldn’t try to paint a masterpiece with a crayon, right? So why try to arrange flowers with tools that weren’t made for the job? The good news is, you don’t need to spend a fortune. As a beginner, you just need the essentials—tools that are affordable, easy to use, and built to last. I’ll highlight budget-friendly options and explain when it’s worth splurging (spoiler: it’s rarely necessary at first).
Another thing I wish I knew when I started: Flower arranging is supposed to be fun, not stressful. The right tools take the frustration out of the process. No more struggling to cut thick stems, no more flowers falling over in your vase, no more wilting blooms that make you feel like you’re “bad at flowers.” With the right floral tools and supplies, you’ll be able to focus on creativity, not combatting poorly made gear.
The Essential Floral Tools for Beginners (Your Must-Have Checklist)
Let’s start with the star of the show: floral tools. These are the handheld tools you’ll use every time you arrange flowers—think cutting, trimming, and shaping. I’ve narrowed down the list to the 5 tools you absolutely need, plus a few “nice-to-haves” that will make your life easier as you progress. Each tool comes with my honest review, tips for using it, and budget-friendly recommendations (because I know not everyone wants to drop $100 on a single pair of scissors).
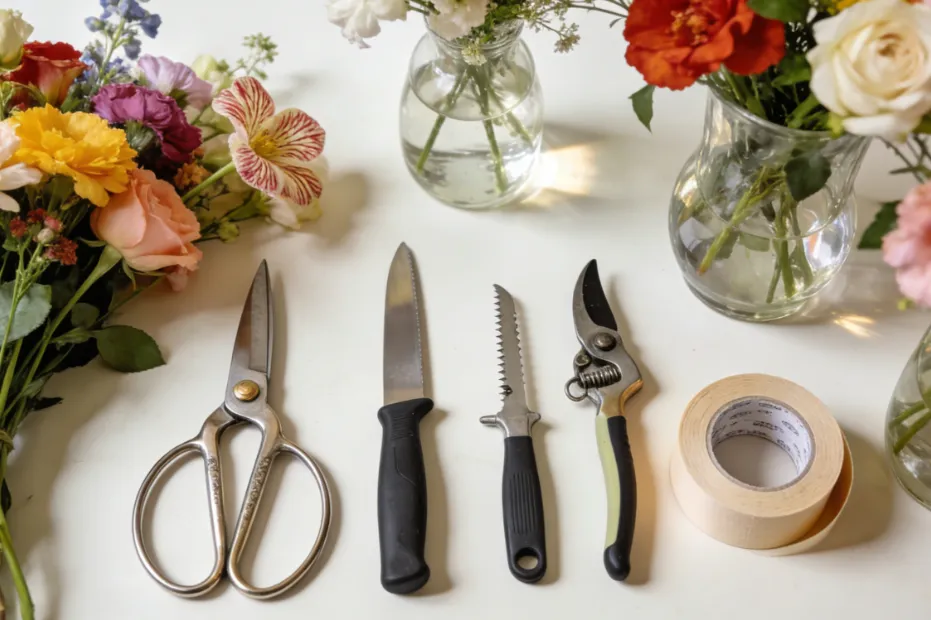
1. Floral Scissors (The Most Important Tool in Your Kit)
Let’s get this straight: Floral scissors are non-negotiable. This is the tool you’ll use more than any other, so it’s worth investing in a good one—but not a fancy one. As a beginner, you don’t need professional-grade floral scissors (those can cost $50+). Instead, look for a pair that’s sharp, lightweight, and comfortable to hold. Avoid kitchen scissors, craft scissors, or any scissors with serrated blades—these will crush your flower stems.
What to look for: A pair with straight, sharp blades (about 5-6 inches long) and a comfortable grip. I recommend getting a pair with stainless steel blades—they’re durable, easy to clean, and won’t rust. My first pair was a $15 set from a local craft store, and it lasted me over a year (until I accidentally dropped it and bent the blade). Now, I use a $25 pair from a floral supply shop, and it’s still going strong.
How to use them: Always cut stems at a 45-degree angle—this increases the surface area for water absorption, keeping your flowers fresh longer. Cut stems under running water (or in a bowl of water) to prevent air bubbles from getting stuck in the stem (air bubbles block water flow, which causes wilting). Never twist or crush the stem—let the scissors do the work. And remember: Floral scissors are for flowers only! Don’t use them to cut wire, tape, or paper—this will dull the blades.
Budget pick: Wilton Floral Scissors ($12-$15) – lightweight, sharp, and perfect for beginners. Pro pick (if you want to splurge): OASIS Floral Scissors ($30-$40) – professional-grade, ergonomic, and built to last.
2. Floral Knife (For Clean Cuts on Thick Stems)
While floral scissors work great for most stems (like roses, daisies, and carnations), you’ll need a floral knife for thicker, woody stems (like hydrangeas, lilacs, or branches). A floral knife is different from a regular kitchen knife—it has a thin, sharp blade that makes a clean, angled cut without crushing the stem. I avoided using a floral knife for months because I was scared of cutting myself, but once I learned how to use it, it became one of my favorite tools.
What to look for: A floral knife with a retractable blade (safer for beginners) and a comfortable handle. The blade should be thin and sharp—avoid thick, heavy blades that are hard to maneuver. I recommend a stainless steel blade that’s easy to sharpen (you’ll need to sharpen it every few months with a sharpening stone).
How to use it: Hold the knife like you would a pencil, with your thumb on the back of the blade for control. Place the stem on a cutting board (never cut in your hand!), and make a 45-degree cut with a smooth, downward motion. For extra thick stems, you can make a small slit up the center of the stem (about 1 inch) to help with water absorption. And don’t worry—you won’t cut yourself if you take your time. I’ve only nicked my finger once, and that was because I was in a hurry (lesson learned: slow down!)
Budget pick: Fiskars Floral Knife ($10-$15) – retractable, easy to use, and affordable. Pro pick: Japanese Floral Knife ($25-$30) – ultra-sharp, lightweight, and loved by professional florists.
3. Floral Pruners (For Thick Woody Stems)
If you plan on using a lot of woody stems (like branches, rosemary, or lavender) in your arrangements, floral pruners are a must. Floral pruners (also called branch cutters) are designed to cut through thick, tough stems that floral scissors and even floral knives can’t handle. They work like a pair of pliers, with a strong, sharp blade that crushes the stem less than regular pruners (yes, there’s a difference between floral pruners and garden pruners!).
What to look for: A pair of floral pruners with a bypass blade (this is the type that makes a clean cut, unlike anvil pruners which crush the stem). Look for a comfortable grip—you’ll be squeezing hard, so you don’t want your hands to get tired. I also recommend a pair with a safety lock to prevent accidental cuts when not in use.
How to use them: Hold the pruners with both hands (for extra strength), place the stem between the blades, and squeeze firmly. Cut at a 45-degree angle, just like you would with floral scissors. Avoid using pruners on thin stems—they’re too powerful and will crush them. Save them for stems that are ½ inch or thicker.
Budget pick: Garden Guru Floral Pruners ($15-$20) – bypass blade, safety lock, and comfortable grip. Pro pick: Felco Floral Pruners ($40-$50) – professional-grade, durable, and loved by florists and gardeners alike.
4. Thorn Stripper (Save Your Fingers!)
If you love roses (who doesn’t?), a thorn stripper is a game-changer. I used to spend 10 minutes picking thorns off each rose with my fingers (and ending up with tiny pricks all over my hands) until I discovered this tool. A thorn stripper is a small, handheld tool with tiny teeth that removes thorns and leaves from rose stems in seconds—no more pricked fingers, no more tedious work.
What to look for: A thorn stripper with metal teeth (plastic teeth break easily) and a comfortable handle. Look for one that’s adjustable—some stems are thicker than others, so you want a tool that can fit different sizes. I have a small, compact thorn stripper that fits in my pocket, and it’s one of the tools I use most often.
How to use it: Place the rose stem in the thorn stripper, with the teeth facing the thorns. Gently pull the tool down the stem— the teeth will remove the thorns and leaves as you go. Be careful not to pull too hard, as this can damage the stem. For extra stubborn thorns, you can use floral scissors to snip them off.
Budget pick: Wilton Thorn Stripper ($8-$10) – affordable, durable, and perfect for beginners. Pro pick: OASIS Thorn Stripper ($15-$20) – sturdier, with sharper teeth for tough thorns.
5. Floral Tape (For Securing Stems and Creating Structure)
Floral tape is a must-have for any beginner—it’s versatile, easy to use, and essential for creating structured arrangements (like bouquets or corsages). Floral tape is different from regular tape—it’s stretchy, waterproof, and sticks to itself (no glue needed!). It’s used to secure stems together, hide wire, and create a neat, polished look.
What to look for: Floral tape in green (the most versatile color, as it blends in with stems) and white (for lighter flowers like lilies or roses). Look for tape that’s stretchy but not too thin—thin tape tears easily, while thick tape is hard to maneuver. I recommend getting a roll of ½ inch wide tape—it’s the perfect size for most arrangements.
How to use it: Start by holding the stems together (for a bouquet) or wrapping wire around a stem (for a corsage). Hold the end of the tape against the stems, then wrap it around tightly, pulling slightly to stretch the tape (this makes it stick to itself). Keep wrapping until you reach the end of the stems, then tear the tape (no scissors needed!). For a neater look, wrap the tape in a spiral motion.
Budget pick: Juvale Floral Tape ($5-$8 for a 6-pack) – affordable, stretchy, and comes in multiple colors. Pro pick: Oasis Floral Tape ($10-$12 per roll) – waterproof, durable, and loved by professionals.
Nice-to-Have Floral Tools (For When You’re Ready to Level Up)
Once you’ve mastered the essentials, these tools will make your flower arranging even easier. You don’t need them right away, but they’re worth adding to your toolkit as you progress:
- Floral Wire: Used to support weak stems (like peonies or ranunculus) or create shapes (like flower crowns). Look for 22-gauge wire (the most versatile size) in green or silver.
- Wire Cutters: Used to cut floral wire (regular scissors will dull quickly). Look for a small, sharp pair that’s easy to hold.
- Floral Picks: Small wooden or plastic picks that are used to attach loose flowers or greenery to arrangements (great for filling in gaps).
- Watering Can with a Long Spout: Makes it easy to water arrangements without getting water on the flowers (which can cause wilting).
Must-Have Florist Supplies for Beginners (Beyond the Tools)
Tools are important, but you also need the right florist supplies to keep your flowers fresh and your arrangements looking their best. These supplies are often overlooked by beginners, but they’re just as essential as the tools. From water vessels to flower food, here’s what you need to stock up on.
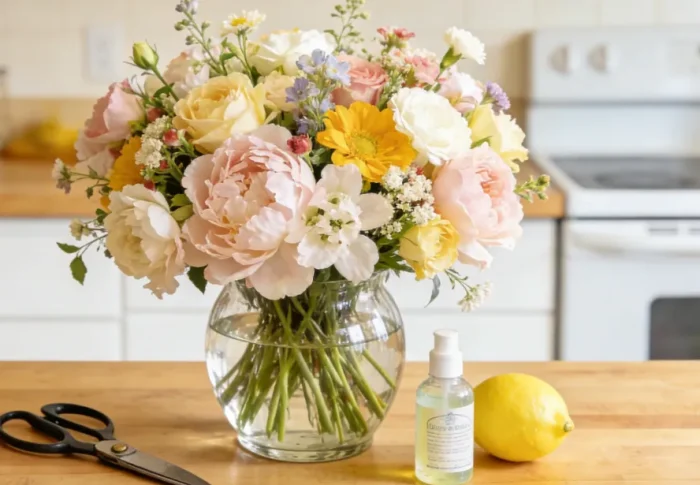
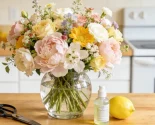
1. Flower Vases and Containers (The Foundation of Your Arrangement)
You can’t arrange flowers without a vase! As a beginner, you don’t need a fancy collection—just a few versatile vases that work with different types of arrangements. The key is to choose vases that are the right size for your flowers: tall vases for long stems (like roses or lilies), short vases for short stems (like daisies or carnations), and wide vases for full arrangements (like hydrangeas or mixed bouquets).
What to look for: Glass vases are great for beginners—they’re affordable, easy to clean, and let you see the water level (so you know when to refill). Look for vases with a wide opening (easy to arrange flowers) and a stable base (so they don’t tip over). You can also use mason jars, teacups, or even old bottles—get creative! The best part is, you can find cheap glass vases at dollar stores, craft stores, or even thrift stores.
Pro tip: If your vase is too wide (and your flowers are falling over), use floral foam (more on that below) or a grid of tape across the top to hold the stems in place. This is a trick professional florists use all the time, and it works wonders for beginners.
2. Floral Foam (For Structured Arrangements)
Floral foam (also called oasis foam) is a game-changer for beginners. It’s a porous, water-absorbing foam that holds stems in place, making it easy to create structured arrangements (like centerpieces or flower crowns). Floral foam comes in blocks (for vases) and wreath forms (for wreaths), and it’s available in wet and dry versions (wet for fresh flowers, dry for artificial flowers).
What to look for: Wet floral foam (for fresh flowers) is essential—dry foam is only for artificial flowers. Look for foam that’s dense (it will hold more water and stems) and easy to cut. I recommend getting a large block of foam (you can cut it to fit any vase) instead of pre-cut pieces—it’s more cost-effective.
How to use it: Soak the foam in water until it’s completely saturated (it will sink to the bottom of the bowl when it’s ready—don’t force it down!). Cut the foam to fit your vase, then place it in the vase (you can secure it with floral tape if it’s loose). Insert the stems into the foam—they will stay in place, and the foam will keep them hydrated. Pro tip: Cut the foam at an angle to fit the vase better, and make sure it’s tall enough to hold the stems securely.
Budget pick: Oasis Wet Floral Foam ($5-$8 per block) – the standard for fresh flower arrangements. Pro pick: Smithers-Oasis Floral Foam ($10-$12 per block) – denser, holds more water, and lasts longer.
3. Flower Food (Keep Your Flowers Fresh Longer)
Flower food is one of the most underrated florist supplies for beginners. It’s a small packet of nutrients that you add to the water in your vase, and it works wonders for keeping your flowers fresh longer. Flower food contains sugar (to feed the flowers), acid (to lower the pH of the water, which helps with water absorption), and a bactericide (to prevent bacteria growth—bacteria is the number one cause of wilting).
What to look for: Pre-packaged flower food (it’s usually free when you buy flowers from a shop, but you can also buy it in bulk). Look for a brand that’s specifically designed for fresh flowers—avoid generic plant food, as it won’t work the same way. You can also make your own flower food at home (mix 1 teaspoon of sugar, 1 teaspoon of bleach, and 2 cups of water), but pre-packaged flower food is easier and more effective.
How to use it: Follow the instructions on the packet—usually, one packet is enough for 1 quart of water. Change the water and add new flower food every 2-3 days to keep your flowers fresh. Pro tip: If you forget to add flower food, your flowers will wilt faster—so don’t skip this step!
4. Watering Tools (Keep Your Flowers Hydrated)
Keeping your flowers hydrated is key to making them last, so you’ll need a few tools to make watering easy. A small watering can with a long spout is essential—it lets you pour water into the vase without getting water on the flowers (water on the petals can cause browning and wilting). You can also use a spray bottle to mist delicate flowers (like hydrangeas or peonies) to keep them fresh.
What to look for: A small, lightweight watering can with a long, narrow spout (easy to reach into vases). A spray bottle with a fine mist setting (avoid heavy mist, which can damage petals). Both are affordable and easy to find at dollar stores or craft stores.
5. Cleaning Supplies (Keep Your Tools and Vases Clean)
Cleanliness is key when it comes to flower arranging. Bacteria in vases or on tools can cause flowers to wilt fast, so you’ll need a few cleaning supplies to keep everything clean. A small brush (like a toothbrush) is great for cleaning the inside of vases (especially narrow vases that are hard to reach). You’ll also need dish soap and warm water to clean vases and tools, and rubbing alcohol to disinfect tools (to prevent the spread of bacteria).
Pro tip: Clean your vases and tools after every use. Rinse vases with warm water and dish soap, then dry them thoroughly. Wipe down tools with rubbing alcohol to disinfect them—this will keep them sharp and prevent bacteria from spreading to your next arrangement.
Nice-to-Have Florist Supplies (For More Creative Arrangements)
As you get more comfortable with flower arranging, these supplies will help you get creative and take your arrangements to the next level:
- Floral Wrapping Paper: For wrapping bouquets (great for gifts). Look for waterproof paper in neutral colors (white, cream, or brown) that complements any flower.
- Ribbon: To add a finishing touch to bouquets or centerpieces. Satin or grosgrain ribbon works best—avoid ribbon that’s too thick (it can overpower the flowers).
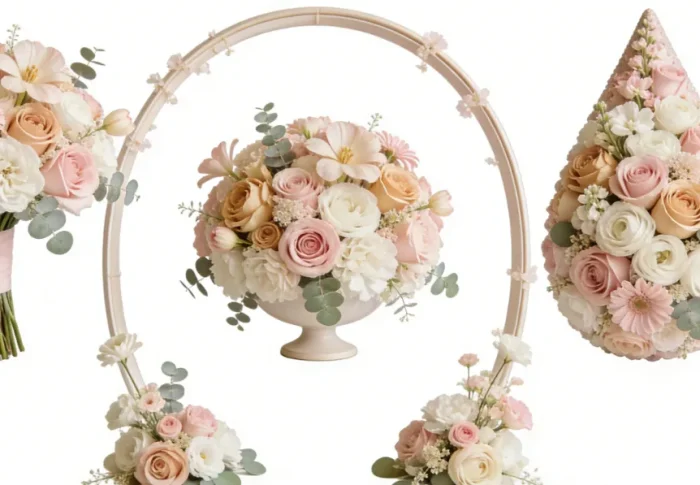
- Decorative Accents: Like pearls, beads, or small feathers—great for adding a personal touch to arrangements (perfect for weddings or special occasions).
- Artificial Flowers: For practice (great if you don’t want to waste fresh flowers) or for arrangements that need to last a long time (like office decor).
Pro Tips for Beginners: How to Use Your Floral Tools and Supplies Like a Pro
Now that you have your toolkit, let’s talk about how to use it to create stunning arrangements. These tips are based on years of trial and error, and they’ll help you avoid the mistakes I made when I first started. Remember: Practice makes perfect, so don’t be too hard on yourself if your first few arrangements don’t look perfect. Every florist started as a beginner!
1. Always Start with Fresh Flowers
No matter how good your tools are, they can’t save wilted flowers. When buying flowers, look for stems that are firm (not soft or mushy), petals that are vibrant (no browning or wilting), and leaves that are green (not yellow). Avoid flowers that have already opened fully—they will wilt faster. If you’re buying flowers from a grocery store, check the water in the bucket—if it’s cloudy or smelly, the flowers are already starting to go bad.
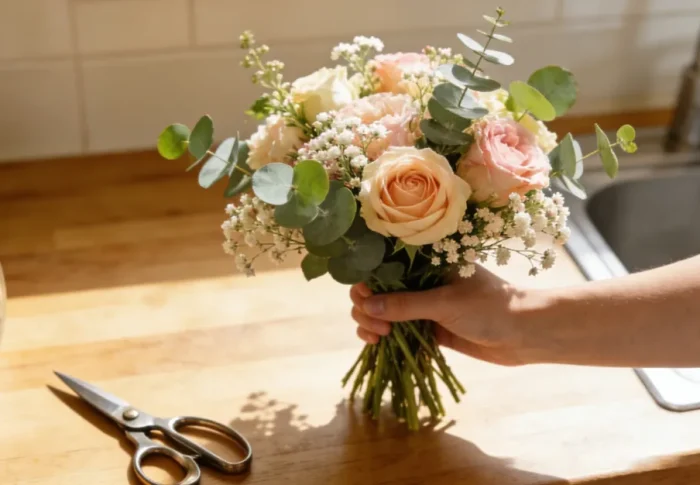
2. Prep Your Flowers Before Arranging
Prepping your flowers is just as important as arranging them. Here’s what to do: First, remove any leaves that will be below the water line (leaves in water cause bacteria growth). Then, cut the stems at a 45-degree angle (under running water) to increase water absorption. If the stems are thick, make a small slit up the center (about 1 inch) to help with water flow. Finally, place the flowers in a vase of water with flower food and let them sit for 1-2 hours (this is called “conditioning”) before arranging. This gives the flowers time to hydrate and recover from being cut.
3. Use the “Rule of Thirds” for Balanced Arrangements
A simple trick to make your arrangements look professional is to follow the “rule of thirds.” This means that the height of your arrangement should be about 1.5 times the height of your vase. For example, if your vase is 10 inches tall, your arrangement should be about 15 inches tall. This creates a balanced, visually appealing look. You can also use the rule of thirds when placing flowers: place the largest flowers in the center (1/3 of the arrangement), medium flowers around them (1/3), and small flowers or greenery around the edges (1/3).
4. Don’t Overcrowd Your Arrangement
One of the biggest mistakes beginners make is overcrowding their arrangements. Too many flowers will make your arrangement look messy and will prevent air flow (which causes wilting). Instead, leave some space between the stems—this lets the flowers breathe and makes the arrangement look more polished. Start with a few focal flowers (the largest, most eye-catching flowers), then add medium flowers and greenery to fill in the gaps.
5. Keep Your Arrangement Away from Heat and Direct Sunlight
Flowers wilt faster in heat and direct sunlight, so keep your arrangement in a cool, shaded area. Avoid placing it near windows (direct sunlight), radiators, or air conditioners (drafts dry out flowers). Also, keep it away from fruit—fruit releases ethylene gas, which causes flowers to ripen and wilt faster.
6. Clean Your Tools After Every Use
As I mentioned earlier, clean tools are essential for keeping your flowers fresh. Wipe down your floral scissors, knife, and pruners with rubbing alcohol after every use to disinfect them. This will prevent bacteria from spreading to your next arrangement and will keep your tools sharp. Also, store your tools in a dry place (avoid moisture, which causes rust).
Where to Buy Floral Tools and Supplies (Budget-Friendly Options)
You don’t need to go to a fancy floral supply shop to buy your tools and supplies. There are plenty of budget-friendly options available online and in stores. Here are my favorite places to buy floral tools and florist supplies as a beginner:
- Dollar Stores: Great for basic supplies like glass vases, spray bottles, and cleaning supplies. You can also find cheap floral scissors and tape here.
- Craft Stores (Michaels, Joann, Hobby Lobby): The best place for floral tools and supplies. They have a wide selection of floral scissors, knives, pruners, floral tape, foam, and wrapping paper—often at a discount (check for coupons!).
- Online Retailers (Amazon, Etsy): Convenient and affordable. Amazon has a great selection of budget-friendly floral tools and supplies, and Etsy has unique, handcrafted supplies (like ribbon and decorative accents) that you won’t find in stores.
- Floral Supply Shops: If you want professional-grade supplies, visit a local floral supply shop. They have a wider selection of tools and supplies, and the staff can give you advice on what to buy (great for beginners!).
Final Thoughts: Your Floral Journey Starts Here
Starting a new hobby can be intimidating, but with the right floral tools and florist supplies, flower arranging can be a fun, relaxing, and rewarding experience. Remember: You don’t need to spend a fortune on gear—just the essentials. Focus on practicing, experimenting, and having fun. Your first few arrangements might not be perfect, but every mistake is a chance to learn and grow.
I still remember the first time I created an arrangement that I was proud of—a simple bouquet of roses and baby’s breath, arranged in a mason jar. It wasn’t perfect, but it was mine, and it made me feel like a pro. With the tools and supplies on this list, you’ll be creating beautiful arrangements in no time.
So what are you waiting for? Grab your floral scissors, pick up some fresh flowers, and start creating. I can’t wait to see what you make. And if you have any questions or need advice, feel free to reach out—I’m always here to help.
Happy arranging, fellow flower lover!