How to Make a Beautiful Flower Bouquet (Like a Pro)
Let me start with a little secret: I used to be the person who’d walk into a grocery store, grab a random bunch of flowers, and jam them into a vase—only to stare at the lopsided, sad mess an hour later, wondering why my arrangement never looked as stunning as the ones from the local florist. Sound familiar? If you’ve ever felt like “I just don’t have a green thumb” or “professional bouquets are too expensive to buy every week,” this DIY flower bouquet tutorial is for you.
Today, I’m pulling back the curtain on how to make a bouquet that looks like it came straight from a high-end floral shop—no fancy training, no expensive tools, and no stress. I’ve spent years experimenting with blooms, testing techniques, and learning from professional florists (shoutout to my friend Sarah, who runs a boutique flower shop in Brooklyn and finally spilled all her secrets). And the best part? Anyone can do this. Whether you’re making a bouquet for your coffee table, a birthday gift, a date night centerpiece, or just to treat yourself (you deserve it!), this step-by-step guide will turn you into a DIY bouquet pro in no time.
We’re talking about lush, balanced arrangements with vibrant colors, texture that pops, and that “effortlessly elegant” look everyone loves. No more lopsided stems, no more wilted blooms, no more feeling like you’re wasting money on flowers that don’t live up to their potential. By the end of this how to make a bouquet guide, you’ll be able to walk into any farmers market, grocery store, or even your own garden, pick out the perfect blooms, and craft a arrangement that’ll make your friends and family ask, “Did you buy this from a florist?” Spoiler: You won’t have to tell them it’s DIY—unless you want to brag (I won’t judge).
First, Let’s Bust the Biggest Myth About Making a Bouquet
Before we dive into the steps, let’s get one thing straight: You do NOT need to be a “creative person” or have a background in floral design to make a beautiful bouquet. Professional florists aren’t born with a magic touch—they just follow simple, repeatable rules that anyone can learn. The biggest mistake beginners make is overcomplicating it: they try to mix too many flowers, they don’t trim stems correctly, or they rush the process. But here’s the truth: making a stunning DIY flower bouquet is all about balance, texture, and a little patience.
I used to overthink every step—should I use roses or peonies? Do these colors clash? Am I holding the stems right? But once I learned the basics, it became second nature. Now, I make a new bouquet every Sunday morning (it’s my favorite self-care ritual) and it takes me less than 30 minutes. And the best part? It costs a fraction of what a professional bouquet would cost—usually $15-$25, compared to $50-$100 for a shop-bought one.
So, let’s stop thinking of bouquet-making as a “talent” and start thinking of it as a skill—one that’s easy to learn, fun to practice, and incredibly rewarding. Ready to get started? Let’s gather our supplies first.
What You’ll Need (No Fancy Tools Required!)
The best part about this DIY flower bouquet tutorial is that you probably already have most of these supplies at home. You don’t need to invest in expensive floral equipment—save that money for more blooms (trust me, you’ll want to). Here’s your checklist:
1. Fresh Flowers (The Star of the Show)
This is the most important part, so let’s talk about how to pick the best blooms. When you’re learning how to make a bouquet, it’s easy to get overwhelmed by all the options, but here’s a simple rule: pick 3-5 types of flowers that complement each other. You’ll want to mix three types of blooms to create balance and texture:
- Focal Flowers: These are the “stars” of your bouquet—large, eye-catching blooms that draw attention. Think roses, peonies, lilies, hydrangeas, or sunflowers. Pick 3-5 focal flowers (depending on how big you want your bouquet to be). These will be the center of your arrangement. Pro tip: If you’re a beginner, start with roses—they’re easy to work with and come in so many colors.
- Secondary Flowers: These are smaller blooms that complement your focal flowers and add depth. They’re not as big, but they fill in the gaps and add visual interest. Good options include ranunculus, carnations, daisies, tulips, or spray roses. Pick 5-7 secondary flowers—they should be smaller than your focal flowers but still colorful.
- Filler Flowers/Greenery: This is the secret to making your bouquet look professional! Filler flowers and greenery add texture, volume, and a “lush” look. They fill in the spaces between your focal and secondary flowers and make the bouquet look full and balanced. Great options include eucalyptus (my personal favorite—its soft leaves add a romantic touch), baby’s breath, ferns, mint, rosemary, or even wildflowers. Pick 2-3 types of greenery/filler—you can never have too much!
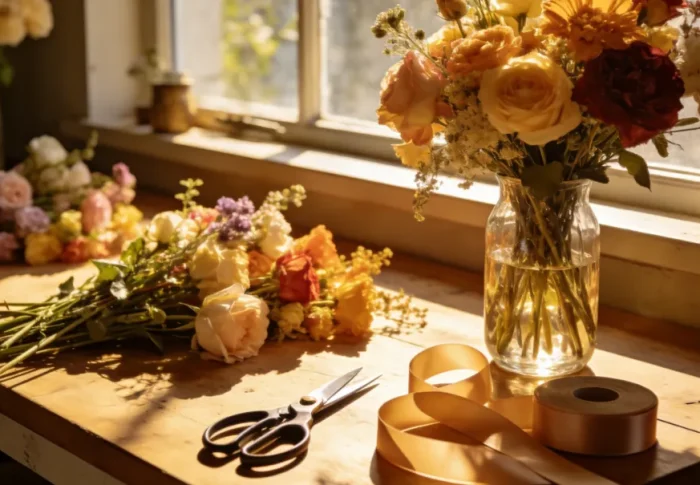
Where to buy flowers? I love shopping at local farmers markets—they have the freshest blooms, and you can support small businesses. But if you don’t have a farmers market nearby, your grocery store’s floral section works too! Look for flowers with firm stems, bright petals, and no wilting leaves. Avoid flowers that feel mushy or have brown edges—those won’t last long.
Pro tip: Buy flowers 1-2 days before you plan to make your bouquet. This gives them time to hydrate and open up a little, which makes them easier to arrange.
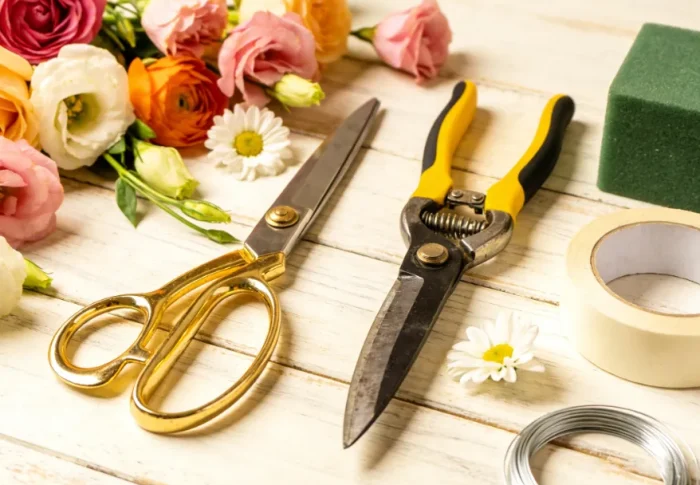
2. Basic Tools
- Sharp Scissors or Floral Shears: Dull scissors will crush the stems, which prevents the flowers from drinking water and shortens their lifespan. If you don’t have floral shears, a sharp pair of kitchen scissors works—just make sure they’re clean.
- Floral Tape: This is used to secure the stems together once you’ve arranged them. It’s stretchy and sticky, and it keeps everything in place. You can find it at craft stores or even some grocery stores—look for green floral tape (it blends in with the stems).
- Ribbon or Twine (Optional): For a finishing touch! Wrap it around the stems after securing them with floral tape to add a pretty, polished look. I love using linen twine for a rustic vibe or satin ribbon for something more elegant.
- A Vase or Bucket of Water: To keep your flowers hydrated while you work. You don’t need the final vase yet—just a container to hold the stems while you arrange them.
- Paper Towels: For cleaning up any water or sap—flower arranging can get a little messy, but that’s part of the fun!
3. Optional Extras (To Elevate Your Bouquet)
If you want to take your DIY flower bouquet to the next level, add these extras:
- Floral Foam: Great if you’re making a bouquet that will sit in a vase (not a hand-tied one). It helps keep the stems in place and keeps the flowers hydrated.
- Water Tubes: Small plastic tubes that you can attach to the ends of stems to keep them hydrated if you’re not putting the bouquet in a vase right away (perfect for gifts!).
- Decorative Wraps: Tissue paper or cellophane to wrap the bouquet in—great for gifts or special occasions.
Step 1: Prep Your Flowers (This Is Non-Negotiable!)
Before you start arranging, you need to prep your flowers. This step is crucial—it ensures your bouquet lasts longer and looks its best. I used to skip this step and wonder why my flowers wilted after 2 days. Now, I never skip it, and my bouquets last 7-10 days (yes, really!). Here’s how to do it:
- Unwrap and Inspect: Take all your flowers out of their packaging and spread them out on a clean surface. Inspect each stem—remove any wilted leaves, brown petals, or thorns (use scissors to snip thorns off roses). If a flower has a broken stem or looks too wilted, set it aside (you can use it for a smaller arrangement later).
- Trim the Stems: This is the most important part of prepping! Hold each stem under running water (this prevents air bubbles from getting into the stem, which blocks water absorption) and cut it at a 45-degree angle. The angle increases the surface area of the stem, so the flower can drink more water. Cut the stems to different lengths—some shorter, some longer. This will help create depth and dimension in your bouquet. A good rule of thumb: the longest stems should be about 1.5 times the height of your final vase.
- Remove Lower Leaves: Any leaves that will be below the water line in your vase should be removed. Leaves in water will rot, which makes the water cloudy and causes the flowers to wilt faster. So, snip off any leaves that are on the lower part of the stem—only leave leaves near the top of the stem (they add texture!).
- Hydrate: Place all the trimmed stems in a vase or bucket of room-temperature water. Let them sit for at least 2 hours (or overnight, if you have time). This gives the flowers a chance to drink up and rehydrate—they’ll be perkier and easier to work with.
Pro tip: Add a packet of flower food to the water (most grocery store flower bundles come with one). Flower food has nutrients that keep the flowers fresh longer. If you don’t have flower food, you can make your own: mix 1 teaspoon of sugar, 1 teaspoon of bleach, and 2 cups of water. The sugar feeds the flowers, and the bleach prevents bacteria growth.
Step 2: Choose Your Color Palette (No More Clashing Blooms!)
One of the biggest mistakes beginners make is mixing too many colors, which makes the bouquet look chaotic. The key to a professional-looking bouquet is a cohesive color palette. You don’t have to be a color expert—just follow these simple guidelines, and you’ll never go wrong:
- Monochromatic: Choose flowers in different shades of the same color. For example, light pink, medium pink, and dark pink roses, with green eucalyptus. This is the easiest palette for beginners—it’s elegant, cohesive, and never clashes.
- Complementary Colors: These are colors that are opposite each other on the color wheel (e.g., red and green, yellow and purple, blue and orange). They create a bold, eye-catching look—perfect for a statement bouquet. Just make sure to balance the colors: use one color as the main focus (e.g., red roses) and the other as an accent (e.g., green eucalyptus or purple ranunculus).
- Analogous Colors: These are colors that are next to each other on the color wheel (e.g., pink, purple, blue; yellow, orange, red). They create a soft, harmonious look—great for a romantic or calm bouquet.
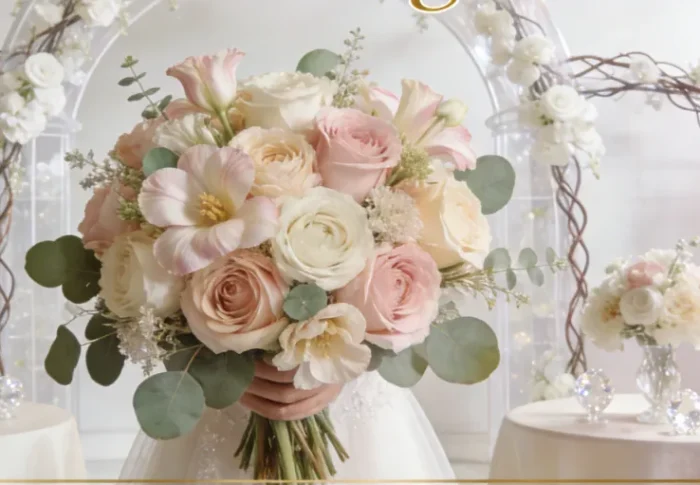
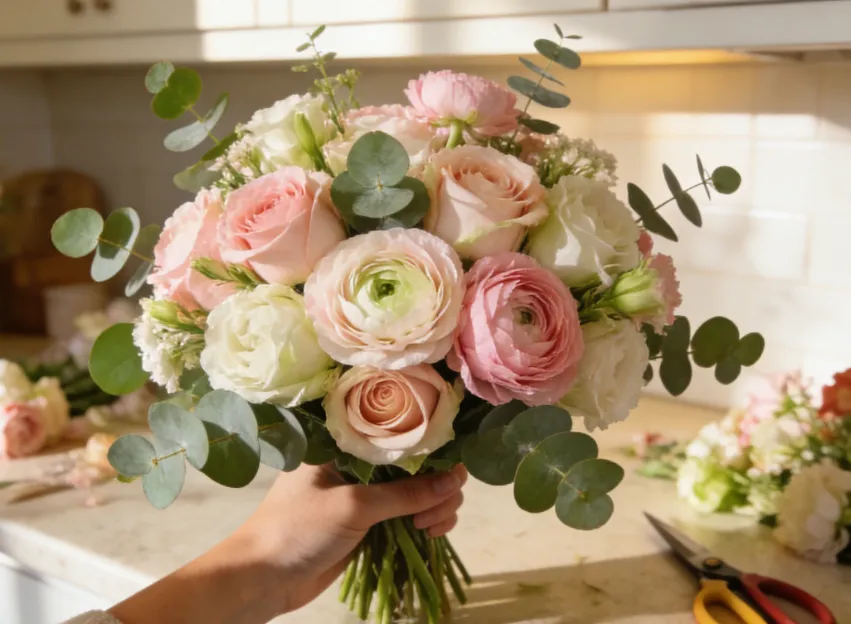
My go-to palette? Soft pink roses (focal), white ranunculus (secondary), and silver dollar eucalyptus (greenery). It’s timeless, romantic, and works for any occasion. But feel free to experiment! If you love bold colors, go for red sunflowers, orange daisies, and green ferns. If you prefer something neutral, try white lilies, cream carnations, and eucalyptus. The best part is that there’s no “wrong” color palette—just pick colors that make you happy.
Pro tip: If you’re unsure, stick to 2-3 main colors. Any more than that can make the bouquet look cluttered.
Step 3: Arrange Your Bouquet (The Pro Method)
Now, the fun part! This is where you’ll put it all together and create your beautiful bouquet. I’m going to teach you the “hand-tied” method, which is the most common method professional florists use. It’s easy once you get the hang of it, and it creates a natural, organic look. Here’s how to do it step by step:
Step 3.1: Start with Greenery (The Foundation)
Hold your dominant hand (right hand if you’re right-handed, left hand if you’re left-handed) out, palm up. Take 2-3 stems of greenery (e.g., eucalyptus) and place them in your hand, angling them slightly outward. These will be the “base” of your bouquet—they’ll add volume and frame the flowers. Make sure the stems cross each other slightly (this helps keep them in place).
Pro tip: Don’t hold the stems too tight—you want them to be loose enough to adjust, but tight enough to stay in place.
Step 3.2: Add Your Focal Flowers (The Stars)
Take your focal flowers (e.g., roses) and add them to the center of the greenery. Hold each focal flower at an angle (about 45 degrees) and place it slightly higher than the greenery. This creates depth—you want the focal flowers to be the center of attention, so they should be the tallest part of the bouquet.
Add 1-2 focal flowers at a time, rotating your hand slightly after each one. Rotating ensures that the bouquet is balanced and round (not lopsided). Make sure the focal flowers are evenly spaced—you don’t want all of them on one side.
Pro tip: If a focal flower is larger than the others, place it in the center—that will be the “centerpiece” of your bouquet.
Step 3.3: Add Secondary Flowers (The Fillers)
Next, add your secondary flowers (e.g., ranunculus) around the focal flowers. These should be slightly shorter than the focal flowers—they fill in the gaps and add texture. Hold each secondary flower at a 45-degree angle, place it between the focal flowers, and rotate your hand after each one.
Don’t worry about being perfect—imperfection is part of the charm! The goal is to create a natural, organic look, not a perfectly symmetrical one. If one side looks a little empty, add an extra secondary flower or a piece of greenery.
Step 3.4: Add More Greenery (The Finishing Touch)
Now, add a little more greenery around the edges of the bouquet to frame it and fill in any remaining gaps. This will make the bouquet look full and lush. You can also tuck small pieces of filler flowers (e.g., baby’s breath) between the stems to add a delicate touch.
Take a step back and look at your bouquet. Is it balanced? Does it have depth? If one side is too tall, trim the stems slightly. If it’s too sparse, add more flowers or greenery. This is the time to adjust—don’t be afraid to move stems around until you’re happy with the look.
Step 3.5: Secure the Bouquet
Once you’re happy with your arrangement, it’s time to secure the stems. Hold the bouquet tightly just below the blooms (where the stems cross) with your non-dominant hand. Take the floral tape and start wrapping it around the stems, starting just below the blooms and working your way down to the end of the stems. Pull the tape tightly as you wrap—this will keep the stems together.
When you reach the end of the stems, cut the tape and tuck the end under the wrap to secure it. If the tape feels loose, wrap it around a few more times—you want the stems to be firmly secured.
Step 3.6: Trim the Stems (Final Adjustment)
Hold the bouquet upside down and trim the bottom of the stems at a 45-degree angle. This ensures that all the stems are the same length (or slightly different, if you want a more natural look) and that they’ll fit into your vase. The length should be about 1-2 inches shorter than the height of your vase—you don’t want the stems to be too long, or the bouquet will look squished.
Step 3.7: Add the Finishing Touch (Optional)
If you want to make your bouquet look extra polished, wrap a ribbon or twine around the stems. Start just below the blooms, wrap it around the stems a few times, and tie it in a bow. You can also add a tag or a small charm if it’s a gift.
Step 4: Arrange in a Vase (Or Wrap It as a Gift)
Now that your bouquet is complete, it’s time to display it! If you’re keeping it for yourself, fill a vase with room-temperature water and add flower food. Place the bouquet in the vase—make sure the stems are fully submerged in water. If the bouquet is too loose, you can add floral foam to the vase to keep the stems in place.
If you’re giving the bouquet as a gift, wrap it in tissue paper or cellophane first. Cut a piece of tissue paper large enough to wrap around the bouquet, place the bouquet in the center, and fold the sides over. Then, wrap it with cellophane (if you’re using it) and tie a ribbon around the top. Add a handwritten note, and you’re done—you have a beautiful, homemade gift that’s sure to impress.
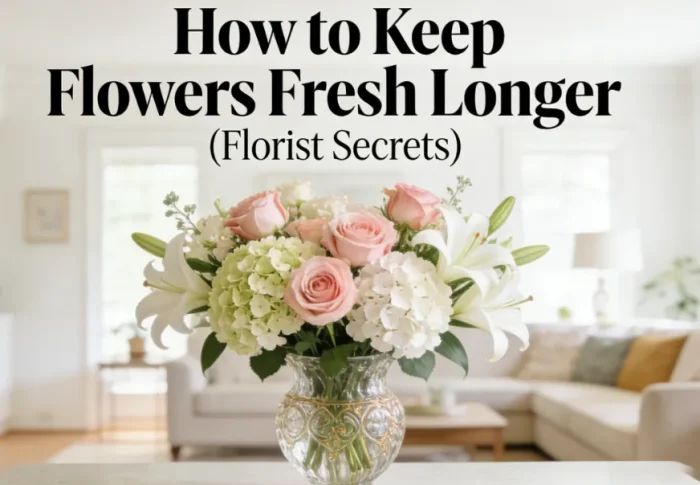
Pro Tips to Make Your Bouquet Last Longer (And Look Better!)
Now that you know how to make a bouquet, let’s talk about how to keep it looking fresh for as long as possible. These tips are from my florist friend Sarah, and they’re game-changers:
- Change the Water Every 2-3 Days: Bacteria grows in water, which causes flowers to wilt. Changing the water regularly keeps the flowers hydrated and fresh. When you change the water, trim the stems again (1/4 inch at a 45-degree angle) to help them absorb water better.
- Keep the Bouquet Away from Heat and Direct Sunlight: Flowers hate heat! Keep your bouquet in a cool, shaded area—away from windows, radiators, and vents. Direct sunlight will cause the flowers to wilt faster.
- Remove Wilted Blooms and Leaves: As soon as a flower or leaf starts to wilt, remove it. This prevents bacteria from spreading to the other flowers.
- Don’t Mix Fruits and Flowers: Fruits (like apples, bananas, and tomatoes) release ethylene gas, which causes flowers to ripen and wilt faster. Keep your bouquet away from fruit bowls.
- Use Room-Temperature Water: Cold water can shock the stems, and hot water can damage them. Room-temperature water is best for hydrating flowers.
Common Mistakes to Avoid (I’ve Made Them All!)
Even the best DIYers make mistakes—here are the ones I’ve made (so you don’t have to!):
- Mixing Too Many Flower Types: I used to think “more is better,” but mixing 5+ types of flowers makes the bouquet look chaotic. Stick to 3-5 types (focal, secondary, filler) for a balanced look.
- Not Trimming Stems Correctly: Skipping the 45-degree cut or cutting the stems too straight will prevent the flowers from drinking water. Always cut at an angle!
- Holding the Stems Too Tight: Holding the stems too tight can crush them, which blocks water absorption. Keep your grip loose but firm.
- Forgetting to Remove Lower Leaves: Leaves in water rot—always remove any leaves that will be below the water line.
- Rushing the Process: Flower arranging is a calming activity—take your time! Rushing will lead to a lopsided bouquet.
DIY Flower Bouquet Ideas for Every Occasion
Now that you know how to make a bouquet, here are some ideas for different occasions—perfect for practicing your new skill:
- Everyday Bouquet: Focal: Pink roses, Secondary: White ranunculus, Filler: Eucalyptus. Simple, elegant, and perfect for your coffee table or kitchen counter.
- Birthday Bouquet: Focal: Sunflowers, Secondary: Orange daisies, Filler: Ferns. Bright, cheerful, and full of joy—perfect for celebrating someone special.
- Romantic Bouquet: Focal: Red roses, Secondary: Purple carnations, Filler: Baby’s breath. Classic and romantic—great for date night or anniversaries.
- Holiday Bouquet (Christmas): Focal: Poinsettias, Secondary: Red berries, Filler: Pine branches. Festive and cozy—perfect for holiday decor.
- Spring Bouquet: Focal: Tulips, Secondary: Daffodils, Filler: Mint. Fresh and bright—captures the essence of spring.
Final Thoughts: You’re Now a Bouquet Pro!
Congratulations—you’ve just learned how to make a beautiful flower bouquet like a pro! Remember, practice makes perfect. Don’t get discouraged if your first bouquet isn’t perfect—mine sure wasn’t. But with each bouquet you make, you’ll get better and more confident.
Flower arranging is more than just putting flowers together—it’s a way to express creativity, practice self-care, and bring beauty into your home (or the homes of your loved ones). There’s something magical about picking fresh blooms, arranging them with your hands, and watching them brighten up a room.
So, grab your scissors, head to the farmers market or grocery store, and start creating! And when you do, tag me—I’d love to see your beautiful DIY flower bouquets. You’ve got this!
P.S. If you loved this how to make a bouquet tutorial, share it with your friends—let’s turn everyone into a DIY bouquet pro. And don’t forget to come back for more floral tips and tricks!