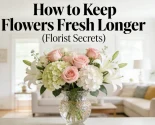
Wedding Floral Techniques: Master Bouquets, Arches & Centerpieces for Unforgettable Celebrations
Hi there, fellow wedding lovers and aspiring floral artists! I’m Clara Bennett, a professional wedding floral designer with over 12 years in the industry—specializing in crafting timeless, Instagram-worthy floral moments for couples across the U.S. and Europe. If you’ve ever stared at a stunning wedding bouquet or a dreamy floral arch and thought, “How do they make that look so effortless?” you’re in the right place. Today, I’m pulling back the curtain on the most essential wedding floral techniques—focused on bridal bouquets, floral arches, and centerpieces—that will take your wedding decor from “nice” to “unforgettable.” Whether you’re a DIY bride prepping for your big day, a new floral designer looking to level up your skills, or just someone who adores the magic of wedding florals, this guide is packed with insider tips, step-by-step tutorials, and trend-forward advice that’s tailored to the tastes of modern couples.
Let’s be real: Wedding florals aren’t just decorations—they’re storytelling tools. They set the tone for your celebration, reflect your unique style (whether that’s boho-chic, classic elegance, rustic farmhouse, or modern minimalist), and create moments that will make your wedding photos feel like works of art. Over the years, I’ve learned that the best wedding floral designs aren’t about over-the-top opulence (unless that’s your vibe!)—they’re about intentionality, balance, and understanding the techniques that make each arrangement shine. And in 2026, the trend is clear: couples want floral designs that feel authentic, sustainable, and tailored to their love story—no cookie-cutter arrangements allowed. That’s why I’m breaking down the three most important elements of wedding floral design: bridal bouquets (the star of the show), floral arches (the perfect backdrop for your “I do’s”), and centerpieces (the heart of your reception). By the end of this guide, you’ll have the knowledge and confidence to create (or commission) florals that feel like “you”—and that will leave your guests talking for years.
First Things First: The Foundations of Wedding Floral Design
Before we dive into the specifics of bouquets, arches, and centerpieces, let’s cover the basics—because even the most stunning arrangements start with a solid foundation. As a-based designer, I’ve learned that欧美 couples prioritize three things when it comes to wedding florals: seasonality, sustainability, and personalization. Gone are the days of importing out-of-season blooms at exorbitant prices; today’s couples want flowers that feel fresh, local, and in line with the time of year. Not only is this better for the planet, but it also creates a more cohesive, natural look that blends seamlessly with your venue (whether it’s a vineyard in Napa, a castle in Tuscany, or a backyard in Vermont).
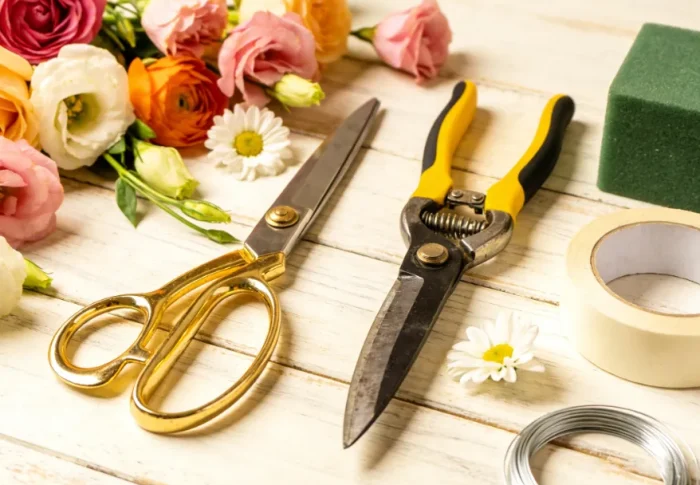
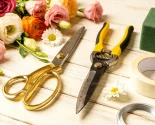
Another key foundation? Understanding flower mechanics. You don’t need to be a professional to master the basics—just a little patience and the right tools. Here’s what you’ll need for almost any wedding floral project (keep this list handy!):
- Fresh, high-quality blooms (I always recommend working with a local florist or flower farm for the best selection—ask about seasonal options!)
- Floral shears (sharp, clean shears are non-negotiable—dull ones crush stems and reduce water absorption)
- Floral tape (both green and clear—green for wrapping stems, clear for delicate details)
- Floral foam (for arches and centerpieces—opt for biodegradable foam to keep it sustainable)
- Water tubes (for keeping bouquet stems fresh before the ceremony)
- Ribbon, twine, or fabric (for wrapping bouquets and adding decorative touches—linen and satin are huge in 2026!)
- Wire (for securing delicate blooms or creating custom shapes)
- Pruners (for thicker stems, like those on roses or peonies)
Pro tip: Always prep your flowers 24–48 hours before your wedding. Cut stems at a 45-degree angle, remove any leaves that will sit below the water line (this prevents bacteria growth), and place them in a clean vase with room-temperature water and flower food. This “hydration period” ensures your blooms stay fresh and vibrant from the ceremony to the reception—trust me, this step is non-negotiable!
Bridal Bouquets: The Ultimate Tutorial for Crafting Your Dream Bouquet
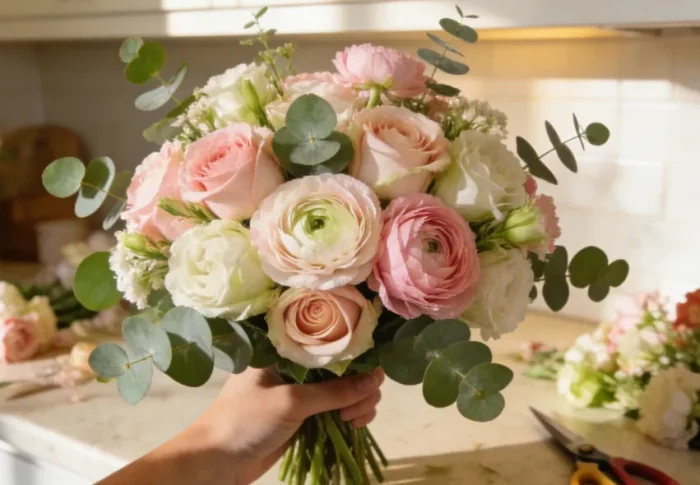
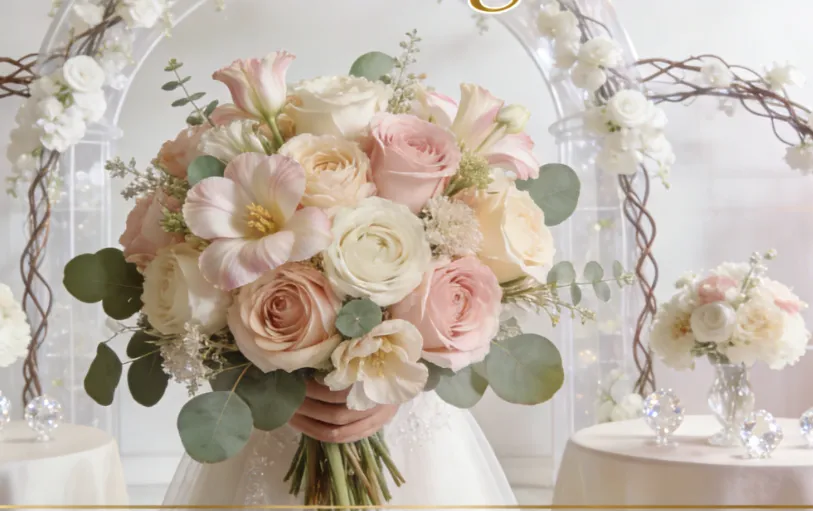
Your bridal bouquet is the most personal floral piece of your wedding day—it’s what you’ll hold as you walk down the aisle, what you’ll toss to your bridesmaids, and what will be front and center in all your wedding photos. As a designer, I’ve crafted hundreds of bridal bouquets, and the one thing I always tell my clients is: your bouquet should feel like an extension of you. Whether you want a small, minimalist posy of garden roses or a large, lush bouquet of peonies and greenery, the techniques below will help you create (or customize) a bouquet that’s perfect for your style.
Step 1: Choose Your Style & Blooms (2026 Trends Included!)
First, decide on the style of your bouquet—this will guide every other decision. Here are the most popular bouquet styles for 2026 (perfect for欧美 couples!):
- Loose, Garden-Style Bouquet: This is the most popular style right now—think unstructured, wild blooms with plenty of greenery (eucalyptus, olive branches, and ferns are huge!). It feels natural, romantic, and effortless—perfect for outdoor weddings, boho brides, or anyone who loves a “just picked from the garden” look. I love using peonies, garden roses, ranunculus, and astilbe for this style.
- Classic Round Bouquet: Timeless and elegant, the round bouquet is a staple for traditional weddings. It’s symmetrical, full, and works with almost any dress style (from ballgowns to sheath dresses). For 2026, I’m seeing round bouquets with a modern twist—adding pops of color (like burnt orange or deep purple) to a neutral base of white and cream roses.
- Cascading Bouquet: Dramatic and glamorous, cascading bouquets (also called “waterfall” bouquets) feature blooms that flow downward, creating a stunning, eye-catching effect. This style is perfect for formal weddings or brides who want to make a statement. I recommend using long-stemmed blooms like calla lilies, orchids, or gardenias, paired with trailing greenery like ivy or jasmine.
- Minimalist Bouquet: Less is more with this style—think a small cluster of 3–5 statement blooms (like peonies, dahlias, or tulips) with minimal greenery. It’s sleek, modern, and perfect for brides who prefer a understated, elegant look. This style pairs beautifully with minimalist wedding dresses and modern venues.
When choosing your blooms, remember to prioritize seasonality. For example, if you’re having a spring wedding, opt for tulips, daffodils, and peonies; for a summer wedding, go for sunflowers, dahlias, and zinnias; for fall, chrysanthemums, dahlias, and maple leaves; and for winter, amaryllis, holly, and evergreens. Not only will seasonal blooms be more affordable, but they’ll also look more natural and cohesive with your wedding theme.
Step 2: Master the Three Core Bouquet Techniques
There are three main techniques for creating bridal bouquets, and each has its own benefits—depending on your style and skill level. I’ll break down each one step by step, so you can choose the method that works best for you.
Technique 1: Hand-Tied Natural Stem Bouquet (Best for Garden-Style & Minimalist Bouquets)
The hand-tied natural stem bouquet is my go-to for most of my clients—it’s versatile, easy to customize, and creates a soft, organic look. Here’s how to do it:
- Start with your focal blooms (the largest, most statement-making flowers—like peonies or garden roses). Hold one focal bloom in your non-dominant hand, with the stem pointing downward at a 45-degree angle.
- Add a second focal bloom next to the first, slightly overlapping the stem and rotating it 45 degrees (this creates a round, full shape). Continue adding focal blooms, rotating each one slightly, until you have a small cluster (3–5 blooms).
- Next, add your secondary blooms (smaller, complementary flowers—like ranunculus or astilbe). Tuck these between the focal blooms, filling in any gaps and adding texture. Again, rotate each stem slightly to keep the bouquet round.
- Add greenery last—this adds volume and texture. Tuck in stems of eucalyptus, olive branches, or ferns around the edges of the bouquet, making sure some greenery extends slightly beyond the blooms for a wild, garden-like look.
- Once you’re happy with the shape, wrap floral tape around the stems (starting just below the blooms and working your way down to the bottom of the stems). Pull the tape tight as you wrap—this secures the stems together.
- Trim the bottom of the stems to a uniform length (about 6–8 inches), then wrap the stems with ribbon, twine, or fabric. Secure the ribbon with a knot or a pin, and add any decorative touches (like a charm or a sprig of baby’s breath) if desired.
Pro tip: Keep your hand relaxed as you build the bouquet—don’t squeeze too tight, as this can crush the stems and reduce water absorption. Also, make sure the blooms are at different heights (some slightly higher than others) to create depth and dimension.
Technique 2: Floral Foam Bouquet (Best for Cascading & Formal Bouquets)
Floral foam (also called a “flower frog” ) is a great option for beginners or for creating more structured bouquets (like cascading styles). It’s a foam base that holds water, keeping your blooms fresh longer, and it’s easy to shape. Here’s how to use it:
- Soak the floral foam in water until it’s fully saturated (it will sink to the bottom of the bowl when it’s ready—don’t force it down!).
- Cut the foam to fit into a bouquet holder (you can find these at craft stores or online). The holder should be comfortable to hold—make sure it’s not too big or too heavy.
- Start by inserting your focal blooms into the foam, placing them at different angles to create the desired shape (for a cascading bouquet, insert some blooms downward to create the “waterfall” effect).
- Add secondary blooms and greenery, filling in any gaps and making sure the foam is completely covered (you don’t want any foam visible).
- Wrap the bouquet holder with ribbon or fabric to cover the foam and the holder itself. Make sure the wrapping is tight and neat—this adds a polished finish.
Pro tip: Floral foam is great for keeping blooms fresh, but it’s important to note that it’s not the most sustainable option. If sustainability is a priority, opt for biodegradable floral foam or stick with the hand-tied method. Also, avoid tossing floral foam bouquets—they’re not meant to be thrown, so have a backup bouquet for the bouquet toss!
Technique 3: Wire & Tape Method (Best for Delicate Blooms & Custom Shapes)
If you’re working with delicate blooms (like orchids, lilies of the valley, or ranunculus) or want to create a custom shape (like a crescent or heart), the wire and tape method is perfect. This technique involves replacing the natural stems with wire, allowing you to bend and shape the blooms exactly how you want. Here’s how to do it:
- Cut a piece of floral wire (22–24 gauge) to twice the length of the flower stem.
- Insert the wire through the center of the flower (from the back of the bloom to the front), then bend the wire in half so that the two ends meet at the bottom of the bloom.
- Wrap floral tape around the wire (starting at the base of the bloom and working your way down the wire) to secure it. Pull the tape tight as you wrap—this will hold the wire in place and mimic the look of a natural stem.
- Repeat this process for all of your blooms and greenery.
- Once all of your stems are wired, arrange them into the desired shape (using the same method as the hand-tied bouquet), then wrap the entire bundle with floral tape and ribbon.
Pro tip: This method is time-consuming, but it’s worth it for delicate blooms or custom shapes. Just be careful not to break the blooms when inserting the wire—go slow and gentle!
Step 3: Bouquet Care & Transport (Don’t Skip This!)
Even the most beautiful bouquet will wilt if it’s not cared for properly. Here’s how to keep your bouquet fresh from the moment you make it until the end of your wedding day:
- Keep the bouquet in a cool, dark place (avoid direct sunlight, heat, or air conditioning vents) until the ceremony.
- If you’re using a hand-tied bouquet, place the stems in a water tube (filled with water and flower food) to keep them hydrated.
- Avoid touching the blooms as much as possible—oil from your hands can damage the petals.
- When transporting the bouquet, use a tall vase or a bouquet box (you can make one with a cardboard box and tissue paper) to keep it upright. If you’re traveling by car, have someone hold the bouquet (don’t put it in the trunk—extreme temperatures will wilt the blooms).
- After the ceremony, place the bouquet in a vase of water (remove the ribbon and tape first) to keep it fresh for photos and the bouquet toss.
Pro tip: If you want to preserve your bouquet after the wedding, hang it upside down in a cool, dark, dry place for 2–3 weeks (this will dry the blooms). Once it’s dry, you can spray it with a floral preservative to keep it looking fresh for years.
Floral Arches: Create a Stunning Backdrop for Your “I Do’s”
A floral arch is one of the most iconic wedding decor elements—it’s the backdrop for your ceremony, the perfect spot for photos, and a beautiful way to frame your love story. Whether you’re having an outdoor wedding in a garden or an indoor wedding in a ballroom, a floral arch adds romance, elegance, and a touch of magic to your big day. As a designer, I’ve created floral arches in every style—from rustic wooden arches draped in greenery to modern metal arches with bold, colorful blooms—and I’m here to share the techniques that will help you create a arch that’s both stunning and sturdy.
Step 1: Choose Your Arch Style & Materials
First, decide on the style of your arch—this will depend on your wedding theme, venue, and personal taste. Here are the most popular arch styles for 2026 (perfect for weddings):
- Rustic Wooden Arch: Made from reclaimed wood, branches, or logs, this style is perfect for outdoor, farm, or boho weddings. It’s warm, natural, and pairs beautifully with greenery, wildflowers, and neutral blooms (like white roses and eucalyptus).
- Modern Metal Arch: Sleek and minimalist, metal arches (usually black, gold, or silver) are great for modern, formal, or city weddings. They’re sturdy, easy to decorate, and look stunning with bold, colorful blooms (like dahlias, sunflowers, or orchids) or simple greenery.
- Floral-Covered Arch: For a dramatic, romantic look, opt for an arch that’s completely covered in blooms and greenery. This style is perfect for formal weddings or brides who want a “fairytale” vibe. I recommend using a mix of focal blooms, secondary blooms, and trailing greenery to create a lush, full look.
- Minimalist Arch: Less is more with this style—think a simple arch with a few clusters of blooms and greenery (usually at the top and sides). It’s perfect for couples who prefer a understated, elegant look and works well with small venues or intimate ceremonies.
When choosing your arch materials, make sure it’s sturdy enough to hold the weight of the flowers and greenery. Wooden and metal arches are the most durable, but you can also use PVC pipes (painted to match your decor) for a budget-friendly option. For the base, use sandbags or concrete blocks to keep the arch from tipping over—this is especially important for outdoor weddings (wind can be a big issue!).
Step 2: Prep Your Arch & Floral Foam
Once you have your arch, it’s time to prep it for the flowers. Here’s what you need to do:
- If you’re using a wooden or metal arch, wrap it with chicken wire (this will hold the floral foam in place). Cut the chicken wire to fit the arch, and secure it with zip ties or floral wire.
- Cut floral foam into pieces that fit the areas of the arch you want to decorate (top, sides, etc.). Soak the foam in water until it’s fully saturated (this will keep your blooms fresh all day).
- Insert the foam into the chicken wire, making sure it’s secure (you can use zip ties or floral wire to hold it in place). Make sure the foam is evenly spaced—you don’t want any gaps where the foam is visible.
Pro tip: If you’re using a large arch, enlist a friend or family member to help you—prepping the arch and foam can be a two-person job!
Step 3: Arrange the Flowers & Greenery (The Fun Part!)
Now it’s time to bring your arch to life! The key to a beautiful floral arch is balance—you want the arrangement to look full and cohesive, but not overcrowded. Here’s my step-by-step method:
- Start with greenery—this creates the base of your arrangement and adds volume. Insert stems of eucalyptus, olive branches, ferns, or ivy into the foam, working from the bottom of the arch up to the top. Make sure the greenery extends slightly beyond the arch to create a soft, natural look.
- Add your focal blooms next—these are the largest, most statement-making flowers (like peonies, roses, dahlias, or lilies). Insert them into the foam at different angles, focusing on the top and sides of the arch (these are the most visible areas). Space the focal blooms evenly—you don’t want too many in one spot.
- Add secondary blooms (smaller, complementary flowers—like ranunculus, astilbe, or baby’s breath) to fill in any gaps between the focal blooms. These flowers add texture and color, making the arrangement look more lush and cohesive.
- Add trailing elements (like ivy, jasmine, or trailing roses) to the sides of the arch—this creates a romantic, cascading effect. Let some of the trailing elements hang down slightly for a soft, whimsical look.
- Step back and assess the arrangement—make sure it’s balanced, with no empty spots. Adjust any blooms or greenery as needed to create a cohesive look.
Pro tip: For a 2026 trend-forward look, try a (asymmetrical) arch—focus more blooms on one side and let greenery trail down the other. This creates a modern, organic look that’s perfect for boho or modern weddings. Also, consider adding non-floral elements (like lanterns, candles, or fairy lights) to the arch for extra magic—especially for evening ceremonies!
Step 4: Arch Care & Setup
To ensure your arch looks stunning all day long, follow these care tips:
- Set up the arch at least 2–3 hours before the ceremony (this gives the flowers time to settle and hydrate).
- If you’re having an outdoor wedding, mist the flowers with water every 30–60 minutes (especially if it’s hot or windy) to keep them fresh.
- Avoid placing the arch in direct sunlight or near heat sources (this will wilt the flowers).
- After the ceremony, you can repurpose the arch for the reception—move it to the entrance, behind the head table, or next to the dance floor for extra decor.
Pro tip: If you’re on a budget, use a mix of fresh and artificial flowers. Artificial flowers are more affordable, last longer, and can be reused after the wedding. Just make sure to choose high-quality artificial flowers that look realistic—no cheap, plastic blooms!
Centerpieces: Elevate Your Reception Tables with Stunning Floral Arrangements
Your reception centerpieces are the heart of your wedding decor—they’re what your guests will look at during dinner, what will make your tables feel inviting and personal, and what will tie your entire wedding theme together. As a designer, I’ve learned that the best centerpieces are both beautiful and functional—they should add to the ambiance without blocking your guests’ view (no one wants to lean around a tall centerpiece to talk to the person across the table!). Today, I’m sharing my favorite techniques for creating centerpieces that are stunning, practical, and on-trend for 2026.
Step 1: Choose Your Centerpiece Style (2026 Trends to Love)
Centerpieces come in all shapes and sizes, and the style you choose will depend on your wedding theme, table size, and personal taste. Here are the most popular centerpiece styles for 2026 (perfect for receptions):
- Low, Lush Centerpieces: This is the most popular style right now—low, wide arrangements that sit close to the table, allowing guests to talk and interact easily. They’re perfect for round or rectangular tables and work with any wedding theme. I love using a mix of blooms and greenery (like peonies, roses, eucalyptus, and ferns) to create a full, lush look.
- Tall, Dramatic Centerpieces: For formal weddings or large reception halls, tall centerpieces add height and drama to the room. They’re usually placed on long rectangular tables (head tables or guest tables) and feature long-stemmed blooms (like calla lilies, orchids, or gladiolus) paired with trailing greenery. Just make sure the centerpieces are no taller than 12–18 inches (so they don’t block guests’ views).
- DIY Terrarium Centerpieces: Perfect for boho, garden, or eco-friendly weddings, terrarium centerpieces are small glass containers filled with succulents, air plants, or small blooms (like baby’s breath or ranunculus). They’re cute, sustainable, and can be taken home by guests as wedding favors—win-win!
- Candle & Floral Centerpieces: For a romantic, intimate vibe, pair candles with small floral arrangements. This style is perfect for evening receptions or winter weddings— the candles add warmth and glow, while the flowers add color and texture. I recommend using pillar candles or tea lights (in glass holders) paired with small clusters of blooms (like roses or ranunculus).
- Minimalist Centerpieces: Less is more with this style—think a single statement bloom (like a peony or dahlia) in a small vase, or a small cluster of greenery (like eucalyptus or olive branches) on a wooden tray. It’s sleek, modern, and perfect for couples who prefer a understated look.
Pro tip: When choosing your centerpiece style, consider your table size. For small round tables (seating 4–6 guests), opt for low, small centerpieces; for large rectangular tables (seating 8–10 guests), you can use a mix of low and tall centerpieces (or a long, low arrangement down the center of the table).
Step 2: Choose Your Vessels & Materials
The vessel you choose for your centerpieces will set the tone for the entire arrangement. Here are some popular vessel options for 2026:
- Glass Vases: Classic and versatile, glass vases (clear, colored, or frosted) work with any style. For a modern look, use tall, thin glass vases; for a romantic look, use short, round glass vases.
- Wooden Containers: Rustic and warm, wooden containers (like wooden boxes, jars, or bowls) are perfect for farm, boho, or outdoor weddings. They pair beautifully with greenery and wildflowers.
- Metal Vessels: Sleek and modern, metal vessels (like gold, silver, or copper vases) are great for formal or modern weddings. They add a touch of elegance and pair well with bold, colorful blooms.
- Terracotta Pots: Perfect for boho or garden weddings, terracotta pots are affordable, sustainable, and look great with succulents, herbs, or small blooms. You can paint them to match your wedding colors for a personal touch.
For materials, you’ll need floral foam (for larger arrangements), floral tape (to secure the foam in the vessel), and your choice of blooms and greenery. If you’re using a clear vase, you can skip the floral foam and just use water (this works best for small, simple arrangements).
Step 3: Create Your Centerpieces (Step-by-Step Tutorial)
Whether you’re making low, lush centerpieces or tall, dramatic ones, the process is similar. Here’s my step-by-step method for creating beautiful, cohesive centerpieces:
- Prep your vessel: If you’re using floral foam, cut it to fit the vessel and soak it in water until it’s fully saturated. Insert the foam into the vessel and secure it with floral tape (this will keep it from moving).
- Add greenery: Start by inserting greenery into the foam (or water) to create the base of your arrangement. For low centerpieces, use greenery to create a “base” that extends slightly beyond the vessel; for tall centerpieces, use long-stemmed greenery to add height.
- Add focal blooms: Insert your focal blooms into the foam (or water), placing them at different angles to create depth and dimension. For low centerpieces, focus on creating a full, round shape; for tall centerpieces, focus on height and symmetry.
- Add secondary blooms: Tuck secondary blooms into the arrangement, filling in any gaps between the focal blooms. These flowers add texture and color, making the arrangement look more lush and cohesive.
- Add finishing touches: Add small details like baby’s breath, berries, or small leaves to fill in any remaining gaps. If you’re using candles, place them around the centerpiece (make sure they’re in glass holders to prevent fires).
- Adjust as needed: Step back and assess the arrangement—make sure it’s balanced, with no empty spots. Adjust any blooms or greenery as needed to create a cohesive look.
Pro tip: For a cohesive look, use the same blooms and greenery in your centerpieces as you did in your bouquet and arch. This will tie your entire wedding floral design together and create a seamless, polished look. Also, consider adding personal touches to your centerpieces—like small photos of you and your partner, or handwritten place cards tucked into the arrangement.
Step 4: Centerpiece Care & Setup
To ensure your centerpieces look stunning throughout the reception, follow these care tips:
- Set up the centerpieces 1–2 hours before the reception (this gives the flowers time to settle and hydrate).
- If you’re using water in the vessels, make sure the water is fresh and add flower food to keep the blooms fresh.
- Avoid placing centerpieces in direct sunlight or near heat sources (this will wilt the flowers).
- If you’re using candles, make sure they’re lit just before the guests arrive (and have a designated person to extinguish them after the reception).
- After the reception, you can send centerpieces home with guests as wedding favors—just add a small tag that says “Thank you for sharing our special day!”
Final Tips for Wedding Floral Success (From a Pro!)
After 12 years in the industry, I’ve learned a few tricks that will help you create (or commission) the perfect wedding florals. Here are my top tips for success:
- Stick to your budget: Wedding florals can get expensive, so it’s important to set a budget and stick to it. Prioritize the elements that matter most to you (e.g., your bouquet and arch) and save on the rest (e.g., use artificial flowers for centerpieces or repurpose ceremony florals for the reception).
- Work with a local florist: A local florist will know the best seasonal blooms, have connections with local flower farms, and can help you create a design that’s tailored to your venue and style. Plus, supporting local businesses is always a win!
- Don’t be afraid to mix and match: You don’t have to use the same blooms or colors throughout your wedding. Mix and match different flowers, greenery, and colors to create a unique, personalized look that reflects your style.
- Practice, practice, practice: If you’re DIY-ing your florals, practice making your bouquet and centerpieces a few weeks before the wedding. This will help you perfect your technique and avoid any last-minute mistakes.
- Embrace imperfection: Wedding florals don’t have to be perfect—some of the most beautiful arrangements are the ones that feel natural and slightly “imperfect.” Don’t stress if a bloom is a little wilted or a stem is a little crooked—these small details make your florals feel authentic and unique.
Final Thoughts
Wedding florals are one of the most magical parts of your big day—they’re a reflection of your love, your style, and the joy of the moment. Whether you’re DIY-ing your florals or working with a pro, the techniques in this guide will help you create beautiful, unforgettable bouquets, arches, and centerpieces that will make your wedding feel like a dream come true.
Remember: The best wedding florals aren’t about being perfect—they’re about being intentional. Choose blooms that you love, styles that reflect your personality, and techniques that work for you. And most importantly, have fun with it! Your wedding day is about celebrating your love, and your florals should be a part of that celebration.
If you have any questions, or if you want to share your wedding floral journey, feel free to leave a comment below—I’d love to hear from you! And if you’re looking for more wedding floral inspiration, follow me on Instagram (@ClaraBennettFlorals) for behind-the-scenes peeks, trend updates, and more tutorials.
Here’s to creating beautiful, meaningful wedding florals that you’ll cherish for a lifetime—cheers to your big day!
— Clara Bennett, Wedding Floral Designer