Professional Floral Design Techniques Used by Florists: Elevate Your Arrangements from Amateur to Expert
Hi there, fellow flower lover! I’m Sarah Bennett, a professional florist with over 12 years in the industry—working with everything from intimate backyard weddings in Vermont to high-end corporate galas in New York City, and even styling editorial shoots for major home decor magazines. Over the years, I’ve learned one thing: anyone can put a few flowers in a vase, but it takes professional floral design techniques to turn a simple bunch into a showstopping arrangement that feels intentional, elegant, and full of life.
If you’ve ever walked into a boutique florist and thought, “How do they make those arrangements look so effortless yet perfect?” you’re not alone. The truth is, there’s no magic—just a set of tried-and-true skills, honed through practice, that professional florists rely on every single day. These aren’t secrets reserved for the pros, though. Today, I’m pulling back the curtain to share the exact professional flower arranging techniques I use with my clients, along with my best florist tips to help you elevate your own floral game—whether you’re arranging flowers for your home, a special event, or even building a side hustle (yes, these skills can turn into income too!).
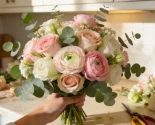
Let’s start with a little truth: floral design isn’t just about “pretty flowers.” It’s about balance, texture, color theory, and understanding how to make each stem shine while working together as a cohesive whole. I’ve seen countless beginners buy the most beautiful blooms, only to cram them into a vase and end up with a lopsided, messy arrangement that doesn’t do the flowers justice. That’s why I’m breaking down the core techniques that separate amateur arrangements from professional ones—techniques that will make your flowers look like they came straight from a high-end florist shop, every single time.
The Foundation: Why Professional Florists Swear by These 3 Core Principles
Before we dive into the specific techniques, let’s talk about the three pillars of professional floral design. These are the rules I teach every one of my interns—because without them, even the most expensive flowers will fall flat. Think of these as the “grammar” of floral arranging; master them, and you can create any style you want, from romantic cottagecore to sleek modern minimalism.
1. Balance: Symmetry vs. Asymmetry (And When to Use Each)
Balance is everything in floral design. Professional florists don’t just “throw flowers together”—we carefully consider how weight, height, and color distribute across the arrangement. There are two types of balance you’ll see in professional work: symmetrical and asymmetrical, and knowing which to use depends on your goal.
Symmetrical balance (also called “formal balance”) is when both sides of the arrangement are mirror images of each other. This is perfect for elegant events like weddings, corporate dinners, or formal centerpieces. Think of a classic round bouquet of roses or a tall, symmetrical arrangement for a mantel. To achieve this, I always start with a central focal flower and build outwards, making sure each stem on one side has a matching stem (in size, color, and texture) on the other. Pro tip: Use a ruler if you’re just starting out—measuring the height of each stem ensures symmetry doesn’t turn lopsided.
Asymmetrical balance (informal balance) is when the arrangement is balanced but not identical on both sides. This is the style you’ll see in most boutique florist shops—it feels more organic, relaxed, and “lived-in,” which is perfect for home decor, casual events, or bohemian-style arrangements. For example, a tall, cascading stem of delphinium on one side might be balanced by a cluster of fuller flowers (like peonies) on the other. The key here is weight, not size: a single heavy stem (like a thick branch) can balance a group of smaller, lighter stems. Professional tip: Imagine a seesaw—if one side feels “heavier,” add a stem or two to the other side to even it out. You’ll know it’s right when your eye moves smoothly across the arrangement without getting stuck on one spot.
2. Texture: The Secret to Making Arrangements Feel Luxurious
If there’s one mistake I see beginners make more than any other, it’s ignoring texture. Professional floral arrangements aren’t just about color—they’re about layers of texture that add depth, interest, and that “high-end” look. Think about it: a bouquet of all roses is beautiful, but add some fuzzy lamb’s ear, spiky eucalyptus, or delicate baby’s breath, and suddenly it feels rich and dimensional.
I categorize texture into three types when designing: focal textures (the main flowers, like roses, peonies, or sunflowers—they’re the “stars” and have a smooth or full texture), supporting textures (the stems that add volume and structure, like eucalyptus, ruscus, or ferns—they have a more structured or feathery texture), and accent textures (the small, delicate details that add whimsy, like baby’s breath, waxflower, or dried pods—they have a fine, intricate texture).
Professional florist tip: Always include at least two types of texture in every arrangement. For example, if you’re using smooth, round peonies (focal texture), pair them with spiky greenery (supporting texture) and tiny waxflower (accent texture). This combination keeps the eye moving and prevents the arrangement from feeling flat. I also love mixing fresh and dried textures—dried pampas grass or dried wheat adds warmth and longevity to fresh arrangements, which is a trick I use for clients who want their flowers to last longer.
3. Color Theory: How to Pick Colors That Work (Without Clashing)
Color is the first thing people notice about a floral arrangement, so getting it right is crucial. Professional florists don’t just pick colors they like—we use color theory to create harmonious, eye-catching combinations that feel intentional. You don’t need a degree in art to master this; just remember these three simple rules that I use every day:
First, monochromatic color schemes: Using different shades of the same color (e.g., light pink, hot pink, and burgundy roses) creates a sophisticated, cohesive look. This is perfect for minimalist home decor or formal events— it feels elegant without being overwhelming. Pro tip: Add depth by mixing different textures in the same color family (e.g., smooth pink roses + fuzzy pink lamb’s ear + delicate pink waxflower).
Second, complementary color schemes: These are colors that are opposite each other on the color wheel (e.g., red and green, purple and yellow, blue and orange). Complementary colors create a bold, eye-catching contrast that’s perfect for casual events, summer arrangements, or when you want to make a statement. Professional tip: Use one color as the “star” (e.g., bright yellow sunflowers) and the complementary color as an accent (e.g., purple asters) to avoid clashing. Don’t use equal parts of both—let one color dominate.
Third, analogous color schemes: These are colors that are next to each other on the color wheel (e.g., pink, purple, and blue; orange, yellow, and green). Analogous colors create a soft, harmonious look that’s perfect for romantic arrangements, baby showers, or cozy home decor. Pro tip: Add a neutral color (like white, cream, or green) to break up the analogous colors and prevent the arrangement from feeling too “busy.”
Bonus florist tip: Consider the mood you want to create. Warm colors (red, orange, yellow) feel energetic and welcoming—great for entryways, dining tables, or parties. Cool colors (blue, purple, green) feel calm and serene—perfect for bedrooms, home offices, or meditation spaces. Neutral colors (white, cream, beige) are timeless and versatile—they work in any space and pair with any other color.
Professional Floral Design Techniques: Step-by-Step Guide to Arranging Like a Pro
Now that we’ve covered the foundational principles, let’s dive into the specific techniques that professional florists use to create stunning arrangements. These are the skills I use every day—from prepping the flowers to styling the final piece—and they’re easy to learn with a little practice.
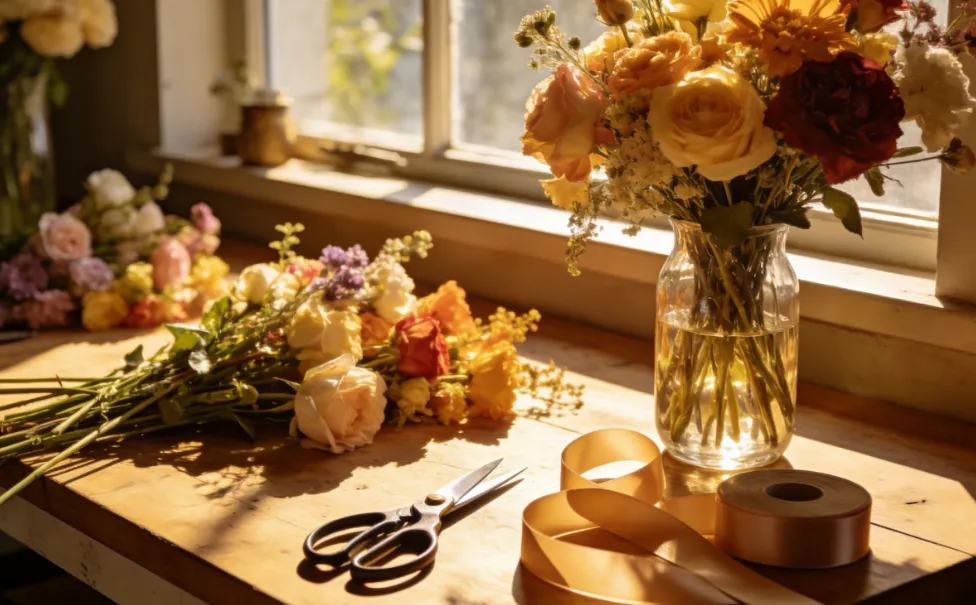
Technique 1: Proper Flower Prep (The Most Overlooked Step!)
Before you even touch a vase, you need to prep your flowers—and this is where most beginners go wrong. Professional florists know that proper prep is the key to making flowers last longer and look their best. Here’s my step-by-step prep process, which I teach all my clients:
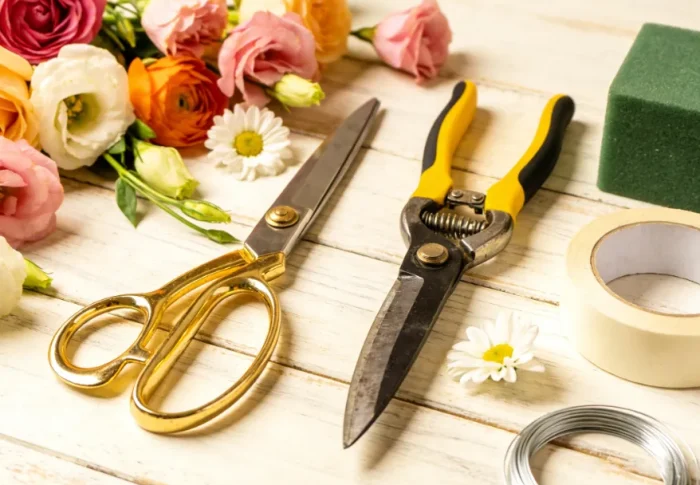
First, trim the stems. Use a sharp pair of floral shears (never kitchen scissors—they crush the stems, preventing water absorption) and cut each stem at a 45-degree angle. Cutting at an angle increases the surface area of the stem, allowing the flower to drink more water. For woody stems (like roses, hydrangeas, or branches), make a small vertical cut up the stem (about 1 inch) to help water penetrate deeper. Pro tip: Trim the stems under running water—this prevents air bubbles from getting stuck in the stem, which can block water flow.
Second, remove foliage that will be below the water line. Any leaves, thorns, or greenery that sits in water will rot, causing bacteria to grow—and bacteria is the #1 reason flowers die early. For roses, remove the thorns (use a thorn stripper or a pair of pliers) and any leaves that will touch the water. For greenery like eucalyptus, strip the lower leaves so only the top foliage remains.
Third, hydrate the flowers. Fill a clean vase with room-temperature water (cold water shocks most flowers, while hot water can damage the stems) and add flower food. Flower food contains nutrients that keep flowers fresh longer—don’t skip this! If you don’t have flower food, you can make your own: mix 1 teaspoon of sugar (for nutrients) and 1 teaspoon of bleach (to kill bacteria) in a quart of water. Let the flowers sit in the water for at least 2 hours (or overnight, if possible) before arranging—this gives them time to drink and rehydrate, which makes them easier to work with and longer-lasting.
Professional tip: Always use a clean vase! Bacteria from old water or dirty vases will shorten the life of your flowers. Wash your vase with hot, soapy water and rinse thoroughly before using.
Technique 2: The Grid Method (For Perfectly Structured Arrangements)
If you’ve ever struggled to keep flowers in place—especially in a wide-mouth vase—you need to learn the grid method. This is a professional technique that creates a “support system” for your flowers, so they stay exactly where you want them. It’s simple, inexpensive, and works for any vase size or shape.
Here’s how to do it: Take a piece of floral tape (or regular clear tape, if you don’t have floral tape) and create a grid across the top of the vase. Start by placing 4-5 pieces of tape horizontally across the opening, spacing them evenly. Then, place 4-5 pieces of tape vertically across the horizontal tape, creating a grid of small squares. The grid doesn’t have to be perfect—just make sure the squares are small enough to hold the stems in place.
Once the grid is in place, you can start inserting stems. The grid will hold each stem upright, preventing them from falling over or shifting. This technique is perfect for beginners because it takes the guesswork out of arranging—you don’t have to worry about your flowers leaning to one side or collapsing. Professional tip: For larger vases, use a floral frog (a metal or glass weight with spikes) instead of tape—insert the stems into the spikes to hold them in place. Floral frogs are a staple in professional florist shops, and they’re easy to find online or at craft stores.
Technique 3: Building the Arrangement (Start with Structure, End with Details)
Professional florists don’t just add flowers one by one—we build the arrangement in layers, starting with the structure and ending with the details. This ensures that the arrangement is balanced, full, and has depth. Here’s my step-by-step process for building any arrangement:
Step 1: Add the greenery (the “foundation”). Start by inserting the supporting greenery (like eucalyptus, ruscus, or ferns) into the grid or floral frog. These stems will create the shape and structure of the arrangement. Insert them at different heights—some taller, some shorter—to create depth. The greenery should extend slightly beyond the vase to frame the flowers and add fullness. Pro tip: Angle the greenery outward slightly, not straight up—this creates a more natural, organic shape.
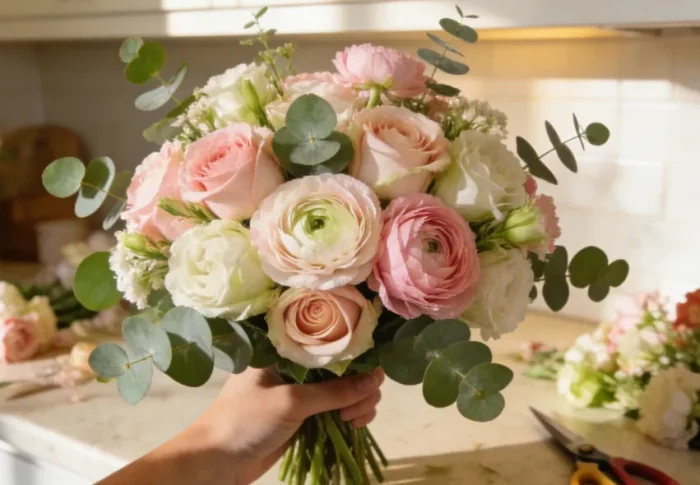
Step 2: Add the focal flowers (the “stars”). Next, insert the focal flowers—the largest, most eye-catching blooms (like roses, peonies, sunflowers, or hydrangeas). These should be placed in the center of the arrangement, slightly lower than the greenery (so they’re the focal point). Space them evenly—don’t cluster them all in one spot. Pro tip: Place the largest focal flower slightly off-center to create visual interest, then build around it with smaller focal flowers.
Step 3: Add the secondary flowers (the “support”). Secondary flowers are smaller than focal flowers but still add color and volume (like carnations, daisies, or ranunculus). Insert them between the focal flowers and greenery, filling in any gaps. These flowers should complement the focal flowers in color and texture—they’re not meant to steal the show, just support the main blooms. Pro tip: Use odd numbers of secondary flowers (3, 5, 7)—odd numbers feel more natural and balanced than even numbers.
Step 4: Add the accent flowers and details (the “finishing touches”). Finally, add the accent flowers and small details (like baby’s breath, waxflower, dried pods, or berries). These are the tiny touches that make the arrangement feel polished and professional. Insert them in the gaps between the other flowers, focusing on the edges of the arrangement to add whimsy and depth. Pro tip: Don’t overdo it—too many accents can make the arrangement feel cluttered. Less is more here!
Technique 4: Creating Depth and Dimension (Avoid Flat, One-Dimensional Arrangements)
One of the biggest differences between amateur and professional arrangements is depth. Professional arrangements have a “front, middle, and back,” which makes them look three-dimensional and lifelike. Here’s how to create depth in your arrangements:
First, vary the height. Don’t let all your stems be the same height—mix tall, medium, and short stems. Tall stems (like delphinium, snapdragons, or long greenery) go in the back of the arrangement, medium stems (focal flowers) in the middle, and short stems (accent flowers) in the front. This creates a “gradual slope” that draws the eye from the back to the front.
Second, angle the stems. Don’t insert all stems straight up—angle some outward, some inward, and some slightly downward. This creates movement and makes the arrangement feel more natural. For example, a stem of eucalyptus angled outward can frame the front of the arrangement, while a focal flower angled slightly downward adds softness.
Third, use negative space. Negative space (the empty space between the flowers) is just as important as the flowers themselves. Professional florists don’t fill every gap—we leave some empty space to let the arrangement “breathe” and to highlight the beauty of each stem. For example, a simple arrangement with a few peonies and eucalyptus, with plenty of negative space, feels more elegant than a crowded arrangement with no empty space.
Technique 5: Styling the Vase (Don’t Neglect the “Frame”)
The vase is the frame for your arrangement, and professional florists know that choosing the right vase (and styling it properly) can take your arrangement to the next level. Here are my top tips for styling the vase like a pro:
First, match the vase to the style of the arrangement. A sleek, modern vase (like a cylinder or cube) works best for minimalist or modern arrangements. A rustic vase (like a mason jar, terracotta pot, or wooden container) is perfect for cottagecore or natural arrangements. A tall, narrow vase is great for long-stemmed flowers (like roses or lilies), while a wide-mouth vase is ideal for full, lush arrangements (like peonies or hydrangeas).
Second, consider the color of the vase. A clear vase is versatile and lets the flowers be the star—perfect for colorful arrangements. A white or cream vase adds elegance and complements any color scheme. A colored vase (like blue, green, or burgundy) can add a pop of color, but make sure it complements the flowers (e.g., a blue vase pairs well with white or yellow flowers, while a green vase pairs well with pink or purple flowers).
Third, add a finishing touch to the vase. Professional florists often add a simple detail to the vase to make it feel polished. For example, wrap a ribbon around the neck of the vase (satin for elegance, burlap for rustic), tie a small bunch of dried greenery to the handle, or add a few pebbles to the bottom of a clear vase for weight and visual interest. Pro tip: Don’t overdo the vase styling—keep it simple so it doesn’t distract from the flowers.
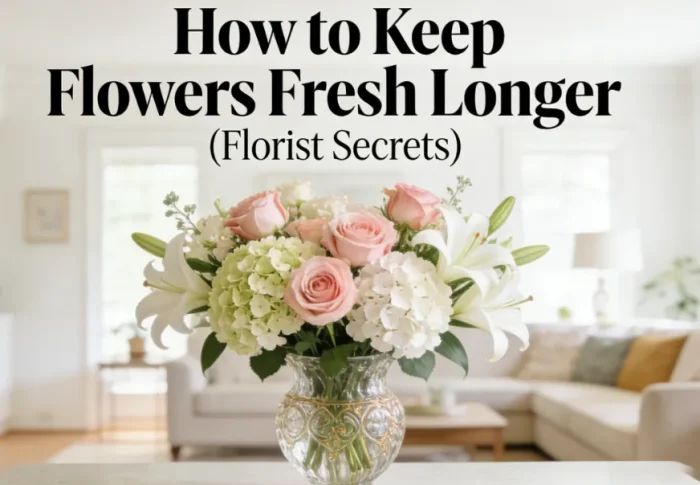
Florist Tips: Pro Secrets to Make Your Arrangements Last Longer (And Look Better)
Now that you know the core techniques, let’s talk about my best florist tips—the little secrets that professional florists use to keep arrangements looking fresh for days (or even weeks!) and make them stand out from the crowd. These tips are easy to implement, and they’ll make a huge difference in the quality of your arrangements.
Tip 1: Change the Water Every 2-3 Days (And Clean the Vase!)
This is the single most important tip for keeping flowers fresh. Bacteria grows quickly in water, and dirty water will make your flowers wilt faster. Every 2-3 days, empty the vase, wash it with hot, soapy water, rinse thoroughly, and refill it with fresh room-temperature water and flower food. Pro tip: When you change the water, trim the stems again (1/4 inch at a 45-degree angle)—this removes any dried or rotting parts of the stem, allowing the flower to drink more water.
Tip 2: Keep Arrangements Away from Direct Sunlight, Heat, and Fruit
Flowers hate heat and direct sunlight—they’ll wilt much faster if placed near a window, heater, or vent. Keep your arrangements in a cool, shaded spot (ideally between 65-75°F). Also, keep them away from fruit! Fruit releases ethylene gas, which accelerates the aging process of flowers and makes them wilt faster. This is a mistake I see all the time—don’t place your flower arrangement next to a bowl of fruit on the kitchen counter!
Tip 3: Remove Wilted Flowers and Foliage Immediately
One wilted flower can ruin the entire arrangement—so remove any wilted blooms, leaves, or stems as soon as you notice them. This prevents bacteria from spreading to the other flowers and keeps the arrangement looking fresh and polished. Pro tip: If a flower is slightly wilted, try submerging the entire bloom (head and all) in cold water for 10-15 minutes—this can revive it!
Tip 4: Use Seasonal Flowers (They’re Cheaper, Fresher, and More Beautiful)
Professional florists always use seasonal flowers—and for good reason. Seasonal flowers are cheaper (they’re easier to source), fresher (they don’t have to be shipped long distances), and they’re perfectly suited to the time of year, which makes your arrangement feel more intentional. For example, in spring, use tulips, daffodils, and peonies; in summer, use sunflowers, zinnias, and dahlias; in fall, use chrysanthemums, dahlias, and dried leaves; in winter, use poinsettias, amaryllis, and evergreens. Pro tip: Check your local farmers’ market for seasonal flowers—they’re often fresher and more affordable than grocery store flowers.
Tip 5: Don’t Be Afraid to Experiment (Mistakes Are Part of the Process)
The best professional florists aren’t perfect—we make mistakes all the time! The key is to experiment and have fun. Try mixing different colors, textures, and flower types. If an arrangement doesn’t turn out the way you want, take it apart and try again. Over time, you’ll develop your own style and learn what works for you. Pro tip: Take photos of your arrangements—this helps you see what works and what doesn’t, and it’s a great way to track your progress.
From Amateur to Pro: How to Apply These Techniques to Any Occasion
Now that you have the techniques and tips, let’s talk about how to apply them to different occasions. Whether you’re arranging flowers for your home, a wedding, a birthday, or a corporate event, these techniques will help you create professional-looking arrangements that impress.
Home Decor Arrangements
For home decor, the goal is to create arrangements that feel warm, inviting, and cohesive with your space. Use asymmetrical balance for a relaxed, lived-in look, and focus on texture and color that complements your decor. For example, if you have a minimalist living room with neutral colors, use a monochromatic arrangement of white roses and eucalyptus in a sleek clear vase. If you have a cozy cottage-style kitchen, use a rustic mason jar with a mix of seasonal flowers (like daisies and carnations) and greenery. Pro tip: Keep home arrangements small to medium-sized—you don’t want them to overwhelm the space.
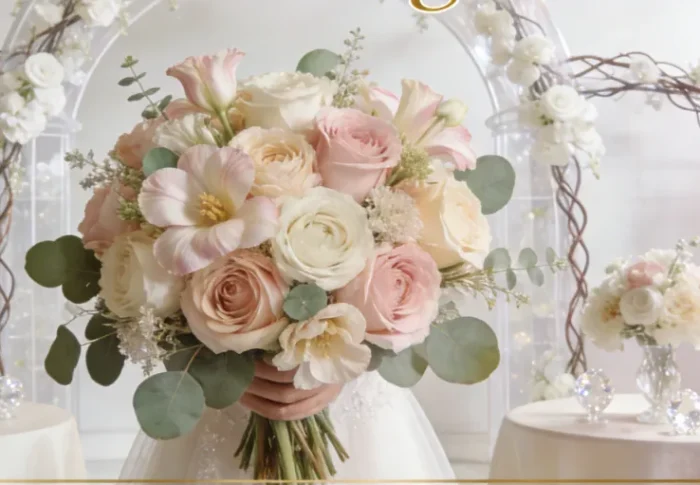
Wedding Arrangements
Weddings are all about elegance and romance, so symmetrical or slightly asymmetrical balance works best. Use complementary or analogous color schemes that match the wedding theme, and focus on focal flowers (like peonies, roses, or lilies) for a luxurious look. For bridal bouquets, use the grid method (or a floral frog) to keep the flowers in place, and add trailing greenery (like ivy or eucalyptus) for a romantic, cascading effect. For centerpieces, keep them low enough so guests can talk across the table—use a wide-mouth vase with a full arrangement of flowers and greenery. Pro tip: Use flower food and change the water daily to keep wedding arrangements looking fresh throughout the day.
Corporate or Event Arrangements
Corporate events call for sleek, professional arrangements that are elegant but not distracting. Use symmetrical balance and neutral colors (white, cream, green, or navy) for a polished look. Focus on clean lines and minimal details—avoid overly fussy arrangements. For reception desks or entryways, use tall, narrow vases with long-stemmed flowers (like lilies or roses) to make a statement. For conference tables, use small, low arrangements that don’t block views. Pro tip: Use high-quality flowers (like long-stemmed roses or orchids) for corporate events—they feel more luxurious and professional.
Gift Arrangements
Gift arrangements should feel personal and thoughtful. Use the recipient’s favorite colors and flowers, and add a personal touch (like a handwritten note or a small gift tied to the vase). For birthday gifts, use bright, cheerful colors (like yellow, pink, or orange) and fun textures. For sympathy gifts, use soft, neutral colors (white, cream, or light blue) and elegant flowers (like lilies or roses). Pro tip: Wrap the vase in tissue paper or ribbon to make the gift feel more special—this is a simple touch that professional florists use to make gifts stand out.
Anyone Can Arrange Flowers Like a Pro
I hope this guide has shown you that professional floral design isn’t reserved for the experts—it’s a set of skills that anyone can learn with practice. The key is to master the foundational principles (balance, texture, color), use the right techniques (prep, grid method, layering), and follow the pro tips to keep your arrangements looking fresh and beautiful.
Remember, floral design is an art form—there’s no “right” or “wrong” way to do it. The most important thing is to have fun and let your creativity shine. Whether you’re arranging flowers for your home, a special event, or just because, these techniques will help you create arrangements that feel intentional, elegant, and full of life.
Now, go grab some flowers, a vase, and get arranging! And if you ever get stuck, remember: even the best professional florists started as beginners. With a little practice, you’ll be creating showstopping arrangements that look like they came straight from a high-end florist shop.
Happy arranging, fellow flower lover!
— Sarah Bennett, Professional Florist