Essential Floral Tools Every Beginner Needs: Your Ultimate Guide to Stress-Free Flower Arranging
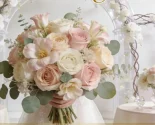
Let me start with a little secret: I’ve been there—standing in a grocery store, staring at a bunch of fresh blooms, feeling equal parts excited and overwhelmed. I’d grab a bouquet of roses, a handful of eucalyptus, and head home, convinced I’d create a Instagram-worthy arrangement. But then? I’d fumble with a dull kitchen scissors, watch stems crush instead of cut, and end up with a lopsided mess that wilted within 24 hours. Sound familiar? If you’re new to flower arranging, you’re not alone—and the problem isn’t you. It’s the lack of the right floral tools.
I used to think flower arranging was just “sticking flowers in a vase,” but after years of experimenting (and plenty of failed attempts), I’ve learned a crucial truth: great floral design starts with great tools. You wouldn’t try to bake a cake without a mixing bowl or a whisk, right? The same goes for arranging flowers. The right floral tools don’t just make the process easier—they turn a frustrating chore into a relaxing, creative ritual. They help you handle blooms with care, create clean cuts that keep flowers fresh longer, and craft arrangements that look like they’re straight from a high-end florist shop.
Today, I’m breaking down the essential floral tools every beginner needs—no fancy, overpriced gear required. Whether you want to spruce up your home with weekly arrangements, create centerpieces for a dinner party, or even dip your toes into selling bouquets, these flower arranging tools will set you up for success. I’ll share exactly what each tool does, why you can’t skip it, how to choose the best one for your budget, and even some pro tips I’ve picked up along the way. Let’s turn those “meh” bouquets into showstoppers—together.
First Things First: Why Your Tools Matter (More Than You Think)
Before we dive into the list, let’s talk about why floral tools are non-negotiable for beginners. When I first started, I tried to “make do” with what I had: kitchen scissors, a butter knife, even a pair of pliers (don’t judge—desperation makes you do weird things). But here’s what I quickly learned:
- Dull, improper tools crush flower stems, blocking water flow and making your blooms wilt faster. A clean cut is the difference between a bouquet that lasts 2 days and one that lasts a full week.
- Cheap, flimsy tools break easily—and nothing kills your creative mojo faster than a scissors that snaps mid-cut or a wire cutter that won’t close.
- The right florist supplies help you work with precision. You’ll be able to trim stems to the perfect length, secure loose blooms, and shape your arrangement exactly how you want it—no guesswork, no frustration.
The good news? You don’t need to drop hundreds of dollars on professional-grade gear to get started. The essential flower arranging tools for beginners are affordable, easy to find, and built to last. Think of them as an investment in your creativity—and in more beautiful, longer-lasting flowers. Let’s get into the list.
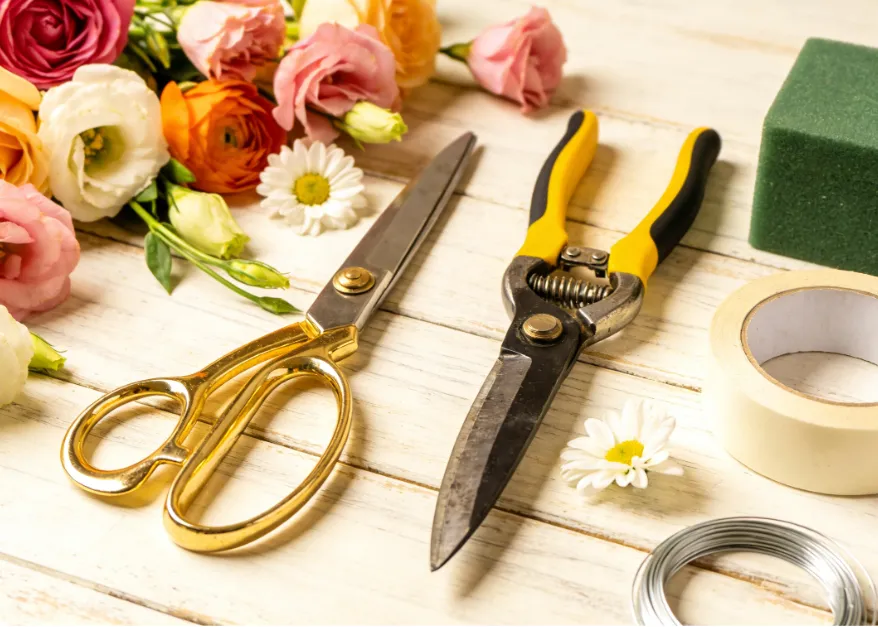
1. Floral Scissors (or Pruners): The Most Important Tool in Your Kit
If you only buy one floral tool, make it a good pair of floral scissors. Not kitchen scissors. Not craft scissors. Floral scissors—specifically designed for cutting flower stems. Trust me, I’ve made the mistake of using kitchen scissors one too many times, and the difference is night and day.
Floral scissors have sharp, bypass blades (meaning one blade slides past the other, like a pair of scissors, rather than crushing) that make clean, angled cuts. This is critical because crushed stems can’t absorb water properly, which leads to wilting. Kitchen scissors, on the other hand, have thick, blunt blades that smash stems, blocking the vascular system that keeps flowers hydrated.
What to look for: Look for floral scissors with stainless steel blades—they’re sharp, rust-resistant, and easy to clean. The handles should be comfortable to hold (you’ll be using them for 10-15 minutes per arrangement, so ergonomics matter!). Avoid cheap plastic handles that feel flimsy—opt for metal or sturdy plastic instead. For beginners, a 6-7 inch pair is perfect—small enough to maneuver, but large enough to cut thicker stems (like roses or hydrangeas).
Pro tip: Never use floral scissors to cut wire, tape, or anything other than flower stems. This will dull the blades over time. I made this mistake early on, and my scissors went from sharp to useless in a month. Keep them dedicated to flowers only!
Budget pick: The Fiskars Floral Scissors (around $10-$15) are perfect for beginners—sharp, durable, and affordable. If you want to splurge a little (and invest in a pair that will last for years), the Mundial Floral Scissors ($20-$25) are a favorite among hobbyists and professionals alike.
2. Floral Knife: For Precision Cuts and Hard Stems
While floral scissors are great for most stems, a floral knife is a game-changer for thicker, woody stems (like branches, lilacs, or peonies) and for making precision cuts. I resisted buying a floral knife for months, thinking scissors were enough—but once I tried one, I never went back.
Floral knives have a thin, sharp blade that glides through woody stems without crushing them. They’re also perfect for making “split cuts” (cutting the stem lengthwise a little way up) to help hydrangeas and other thirsty flowers absorb more water. And if you’re working with delicate blooms (like ranunculus or tulips), a floral knife lets you trim stems with more control, so you don’t damage the fragile petals.
What to look for: Choose a floral knife with a retractable blade (safer for storage!) and a comfortable grip. The blade should be made of high-carbon steel—this keeps it sharp longer. Avoid knives with thick, bulky blades—you want something thin and nimble.
Pro tip: Always cut stems at a 45-degree angle with a floral knife (or scissors!). This increases the surface area for water absorption, keeping your flowers fresher longer. I also like to make a small vertical cut up the stem (about 1 inch) for thicker stems—this helps them drink more water.
Budget pick: The Precision Floral Knife by Creative Hobbies ($8-$10) is perfect for beginners—it’s affordable, easy to use, and has a retractable blade for safety. For a more professional option, the Japanese Floral Knife by Kikuwa ($15-$20) is sharp, durable, and loved by florists.
3. Floral Foam (Oasis): The Secret to Stable Arrangements
If you’ve ever tried to arrange flowers in a wide-mouthed vase and watched them flop over, you know how frustrating it can be. That’s where floral foam (also called Oasis) comes in. Floral foam is a porous, water-absorbing foam that holds stems in place, making it easy to create balanced, professional-looking arrangements—even if you’re a total beginner.
Floral foam is essential for arrangements like centerpieces, wreaths, or bouquets in shallow containers. It soaks up water and keeps stems hydrated while holding them in the exact position you want. I use floral foam for almost every arrangement I make now—from small tabletop bouquets to large wedding centerpieces. It takes the guesswork out of keeping flowers upright, so you can focus on creating a beautiful design.
What to look for: Choose “wet floral foam” (not dry foam—dry foam is for artificial flowers only!). Wet floral foam is designed to absorb water and keep fresh flowers hydrated. Look for foam that’s dense (it won’t crumble easily) and easy to cut. Most floral foam comes in blocks, which you can trim to fit any container.
Pro tip: Always soak floral foam in water until it’s completely saturated—don’t just run it under the tap. If you push it down into a bowl of water, it will absorb water evenly. If you don’t soak it fully, it will dry out your flowers instead of hydrating them. I also like to add a floral preservative to the water when soaking the foam—it helps keep flowers fresh longer.
Budget pick: The Oasis Wet Floral Foam Blocks ($5-$8 for a 4-pack) are the standard for beginners—affordable, easy to use, and widely available. You can find them at craft stores, garden centers, or online.
4. Floral Tape: For Securing Stems and Adding Structure
Floral tape is a must-have for any beginner’s floral tool kit. It’s a thin, stretchy tape that’s used to secure stems together, cover wire, or add structure to delicate blooms. I use floral tape every time I make a bouquet—without it, the stems would slip and slide, and the arrangement would fall apart.
There are two main types of floral tape: green floral tape (the most common) and clear floral tape. Green floral tape blends in with stems, making it perfect for bouquets and arrangements where you don’t want the tape to be visible. Clear floral tape is great for transparent vases or for securing stems to floral foam without hiding the foam.
What to look for: Choose floral tape that’s stretchy but not flimsy. It should stick to itself (no glue needed!) when you wrap it around stems. Avoid cheap tape that tears easily—you want something that will hold stems securely.
Pro tip: When wrapping floral tape around stems, pull it slightly as you wrap—this activates the adhesive and makes it stick better. Start at the top of the stems (near the blooms) and wrap down to the bottom, overlapping the tape slightly as you go. For extra security, wrap the tape around the stems a few times at the bottom.
Budget pick: The Darice Green Floral Tape ($3-$5 for a roll) is perfect for beginners—it’s affordable, stretchy, and blends in with most stems. If you need clear tape, the Clear Floral Tape by Creative Hobbies ($4-$6) works great.
5. Floral Wire: For Shaping and Supporting Delicate Blooms
Floral wire is another essential tool for beginners, especially if you’re working with delicate or floppy blooms (like tulips, ranunculus, or daffodils). It’s used to support stems, shape flowers, or create custom arrangements (like flower crowns or boutonnieres). I didn’t realize how useful floral wire was until I tried to arrange a bouquet of tulips—they kept flopping over, and no amount of tape would hold them up. A little floral wire, and suddenly they stood tall!
Floral wire comes in different gauges (thicknesses)—the lower the gauge number, the thicker the wire. For beginners, 22-gauge wire is perfect—it’s thick enough to support most blooms, but thin enough to bend easily. You can also use thinner wire (24-gauge) for delicate flowers or thicker wire (20-gauge) for heavier blooms.
What to look for: Choose floral wire made of galvanized steel—it’s rust-resistant and easy to bend. Avoid wire that’s too stiff (it will break when you bend it) or too flimsy (it won’t support the stems). Most floral wire comes in green or silver—green blends in with stems, while silver is great for decorative touches.
Pro tip: To support a floppy stem, insert a piece of floral wire alongside the stem (from the bottom of the stem up to the bloom) and wrap it with floral tape to secure it. This gives the stem extra support without damaging the flower. For flower crowns, use 22-gauge wire to create a base, then attach flowers with floral tape.
Budget pick: The Darice Floral Wire (22-gauge, green) ($4-$6 for a spool) is perfect for beginners—it’s affordable, easy to bend, and widely available. You can find it at craft stores or online.
6. Floral Preservative: Keep Your Flowers Fresh Longer
Okay, technically, floral preservative is a florist supply, not a “tool”—but it’s so essential for beginners that I had to include it. I used to skip floral preservative, thinking it was a “luxury,” but once I started using it, I noticed a huge difference in how long my flowers lasted. A good floral preservative feeds your flowers, kills bacteria in the water, and keeps them looking fresh for days longer.
Floral preservative comes in packets (usually included with store-bought bouquets) or in a liquid form that you can mix with water. It contains sugar (to feed the flowers), bleach (to kill bacteria), and acid (to help the stems absorb water). Using it is simple: just mix it with water in your vase or floral foam, and your flowers will thank you.
What to look for: Choose a floral preservative that’s specifically designed for fresh flowers (avoid preservatives for artificial flowers). Look for packets that are easy to mix—no measuring required. If you prefer a liquid, choose one that’s concentrated (a little goes a long way).
Pro tip: If you run out of floral preservative, you can make your own! Mix 1 teaspoon of sugar, 1 teaspoon of bleach, and 1 quart of water. This homemade version works almost as well as store-bought preservative. Just be sure to change the water (and add new preservative) every 2-3 days to keep bacteria at bay.
Budget pick: The Floralife Fresh Flower Food ($5-$8 for a 10-pack of packets) is affordable and effective. It’s the same preservative used by professional florists, and it’s easy to use—just tear open a packet and mix with water.
7. Watering Can (or Spray Bottle): For Hydrating and Mistening
A small watering can or spray bottle is another must-have for beginners. You’ll need it to water your floral foam (to keep it hydrated) and to mist delicate blooms (like hydrangeas or orchids) that need extra moisture. I use a small watering can to fill vases and soak floral foam, and a spray bottle to mist my arrangements every morning—this keeps the petals fresh and vibrant.
What to look for: Choose a small watering can with a narrow spout—this makes it easy to pour water into tight spaces (like between stems in a vase or onto floral foam). For a spray bottle, look for one with a fine mist setting—you don’t want to drench the flowers, just give them a light spritz.
Pro tip: Mist your arrangements in the morning and evening to keep the petals hydrated, especially in dry climates. Avoid misting flowers with delicate petals (like roses) too much—this can cause mold. For hydrangeas, misting the petals helps them stay full and vibrant.
Budget pick: The Bloem Small Watering Can ($10-$15) is perfect for beginners—it’s small, lightweight, and has a narrow spout. For a spray bottle, the Plastic Spray Bottle by Beautify Beauties ($3-$5) is affordable and works great.
8. Floral Tool Organizer: Keep Your Gear Tidy
Last but not least: a floral tool organizer. When I first started, I kept my scissors, knife, tape, and wire in a messy drawer—and I always lost something when I needed it most. A tool organizer keeps all your floral tools in one place, so you can find what you need quickly and keep your workspace tidy.
You don’t need anything fancy—a simple caddy, a small basket, or even a pencil case works. The key is to have separate compartments for each tool, so you don’t have to dig through a pile of scissors and wire to find your floral knife.
What to look for: Choose an organizer that’s lightweight and easy to carry (if you like to arrange flowers in different parts of your home). Look for compartments of different sizes—smaller compartments for tape and wire, larger compartments for scissors and a knife. A waterproof organizer is a bonus, since you’ll be working with water.
Pro tip: Label your compartments so you can find your tools even faster. I used a permanent marker to label mine: “Scissors,” “Knife,” “Tape,” “Wire”—it saves me so much time! You can also add a small pocket for floral preservative packets.
Budget pick: The ArtBin Floral Tool Caddy ($15-$20) is perfect for beginners—it has multiple compartments, a handle for easy carrying, and is waterproof. If you want something simpler, a small wicker basket ($5-$10) works great too.
Bonus: Optional (But Useful) Florist Supplies for Beginners
Once you have the essential floral tools, you might want to add a few extra florist supplies to take your arrangements to the next level. These aren’t necessary for beginners, but they’re fun to have and can make your designs look even more professional:
- Floral Picks: Small wooden or plastic picks that you can attach to small blooms or greenery to make them longer. Perfect for filling gaps in arrangements.
- Ribbon: For wrapping bouquets or adding decorative touches to arrangements. Satin, grosgrain, or burlap ribbon all work great—choose a color that complements your flowers.
- Vases: A few different sizes and shapes of vases (clear, colored, or ceramic) to accommodate different arrangements. Start with a small cylinder vase and a wide-mouthed bowl—they’re versatile and work for most bouquets.
- Pruning Shears: For thicker branches or woody stems (like hydrangea branches or lilac). If you plan to work with a lot of woody stems, pruning shears are a great addition to your kit.
Putting It All Together: Your Beginner Floral Tool Kit
Now that you know the essential floral tools, let’s recap what you need to start: – Floral scissors (or pruners) – Floral knife – Floral foam (wet) – Floral tape (green or clear) – Floral wire (22-gauge) – Floral preservative – Watering can or spray bottle – Tool organizer
You can put together a complete beginner’s kit for under $50—most of these tools are affordable and widely available at craft stores, garden centers, or online (Amazon, Michaels, and Hobby Lobby all have great selections). And remember: you don’t need to buy the most expensive tools to get started. Focus on quality over price—invest in tools that will last, but don’t break the bank.
Final Tips for Using Your Floral Tools Like a Pro
Now that you have your tools, here are a few final pro tips to help you make the most of them and create beautiful arrangements:
- Always clean your tools after use. Wipe down scissors and a knife with a damp cloth to remove any sap or water, then dry them thoroughly. This prevents rust and keeps them sharp.
- Cut stems under running water (or in a bowl of water). This prevents air bubbles from getting into the stem, which can block water flow. I like to cut stems right before I put them in the vase or floral foam.
- Remove any leaves that will be below the water line. Leaves in water will rot, causing bacteria to grow—which makes your flowers wilt faster. This is a simple step, but it makes a huge difference!
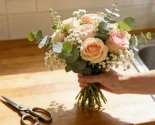
- Start small. Don’t try to create a huge centerpiece on your first try. Start with a small bouquet of 3-5 flowers and build your way up. This will help you get comfortable with your tools and learn the basics of arrangement.
- Have fun! Flower arranging is supposed to be relaxing and creative—don’t stress if your first few arrangements don’t turn out perfect. Practice makes perfect, and every mistake is a chance to learn.
Wrapping Up: Your Journey to Beautiful Flower Arranging
I hope this guide has helped you understand the essential floral tools every beginner needs. Remember: the right tools don’t just make flower arranging easier—they help you create arrangements that you’ll be proud to display in your home, give as gifts, or even sell. You don’t need to be a professional florist to make beautiful bouquets—all you need is a little creativity and the right tools.
When I first started, I never thought I’d be able to create arrangements that looked like they came from a shop. But with these tools and a little practice, I’ve turned my hobby into a passion—and I hope you do too. So grab your floral scissors, pick up a bunch of fresh blooms, and get started. I can’t wait to see what you create!